
Oreo Layer Cake Recipe
What’s better than an Oreo cookie? An Oreo cake, of course! Okay, maybe it’s a long shot to say it’s better, but if there’s anything I like as much or even more than Oreos, it’s cake! (I’ve had entire diatribes about how much I love cake, trust me) As an Oreo lover, I’m pretty sure I just might be able to eat my weight in Oreos. There is just something so special about the chocolatey flavor of the cookie! (though I’m not a double or even triple stuffed type - it’s Oreo thins or regular Oreos for me always)
So you can imagine my absolute delight when I stumbled across this video showcasing this delectable and beautiful OREO LAYER CAKE! Technically cookies and cream layer cake, but we know it’s really Oreos.
After drooling over this video, I could just picture the decadence of this cake and couldn’t resist trying my hand at it myself!
You can check out my adjusted recipe below!
This recipe required a lot more steps and ingredients than I’m often used to with baking because I’m still a beginner, but I was definitely ready for this challenge, especially if I was going to end up with some delicious cake at the end of it!
Before I could start on my cake, I had to get my hands on some dutch-processed cocoa. I had no idea there were even different kinds of cocoa outside of the Hershey’s cocoa powder you could find at the grocery store. It wasn’t until I watched the video above that I knew there was such a thing as dutch-processed cocoa! I figured if anywhere would have this ingredient it was a speciality baking supply store and luckily I have one nearby, so I made a stop there and was introduced to a whole new world of cocoa! I had no idea there were so many different kinds that offered unique flavor profiles! I believe in the video they just mention dutch cocoa, but at the baking supply store there were like seven different varieties of dutch-processed cocoa, so I just picked the darkest one, the noir cocoa, because it looked the closest to the one in the video.
The Ingredients

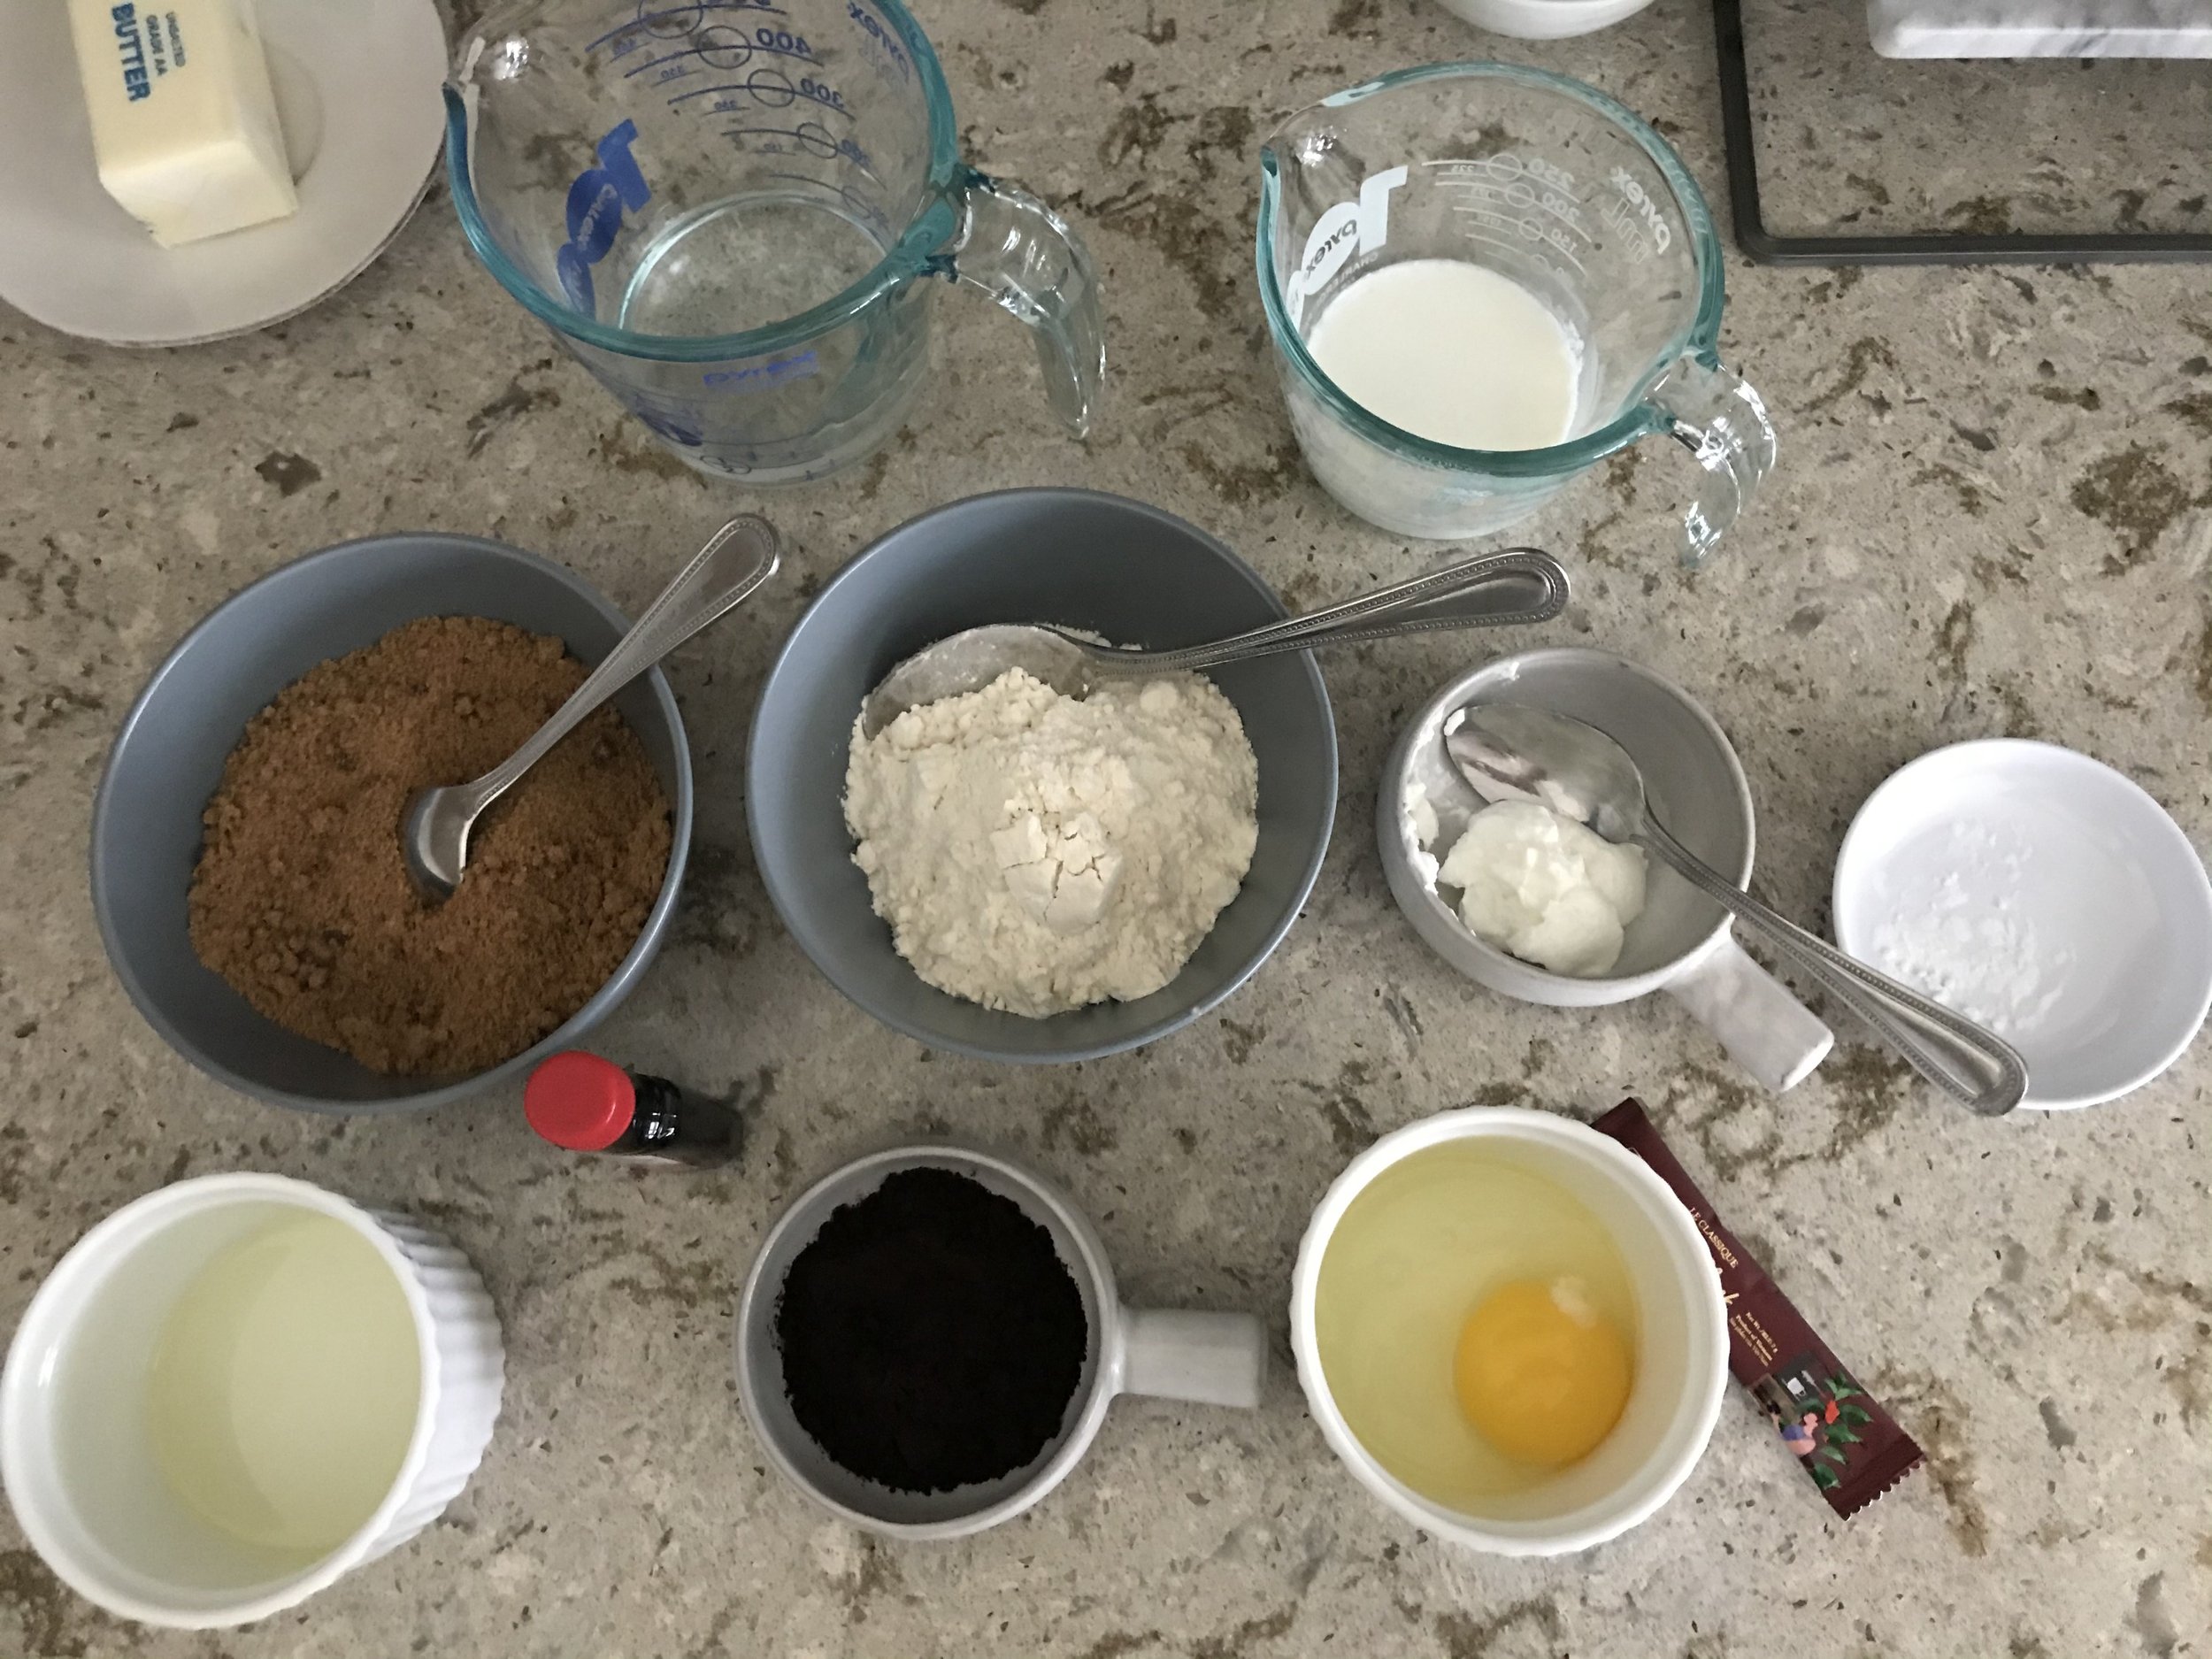
First things first, I had to assemble my ingredients. Like I said, there were a lot of ingredients in this recipe, mostly because there are all the different parts to it: the white layer, the chocolate layers, and the cream.
Another thing about this recipe was that it called for quite a lot of butter. I’m typically the type of person who will reduce the sugar content of any recipe I make and try to avoid using butter when possible because I feel like it makes the recipe a bit healthier. How much? Not sure, but it gives me the impression that I did a good thing for myself and makes me feel just a little less guilty. So instead of using the full amount of butter, I actually substituted some of it with greek yogurt (ratios noted below), and the texture and taste still turned out awesome, so I was really happy with that!
The Baking Process
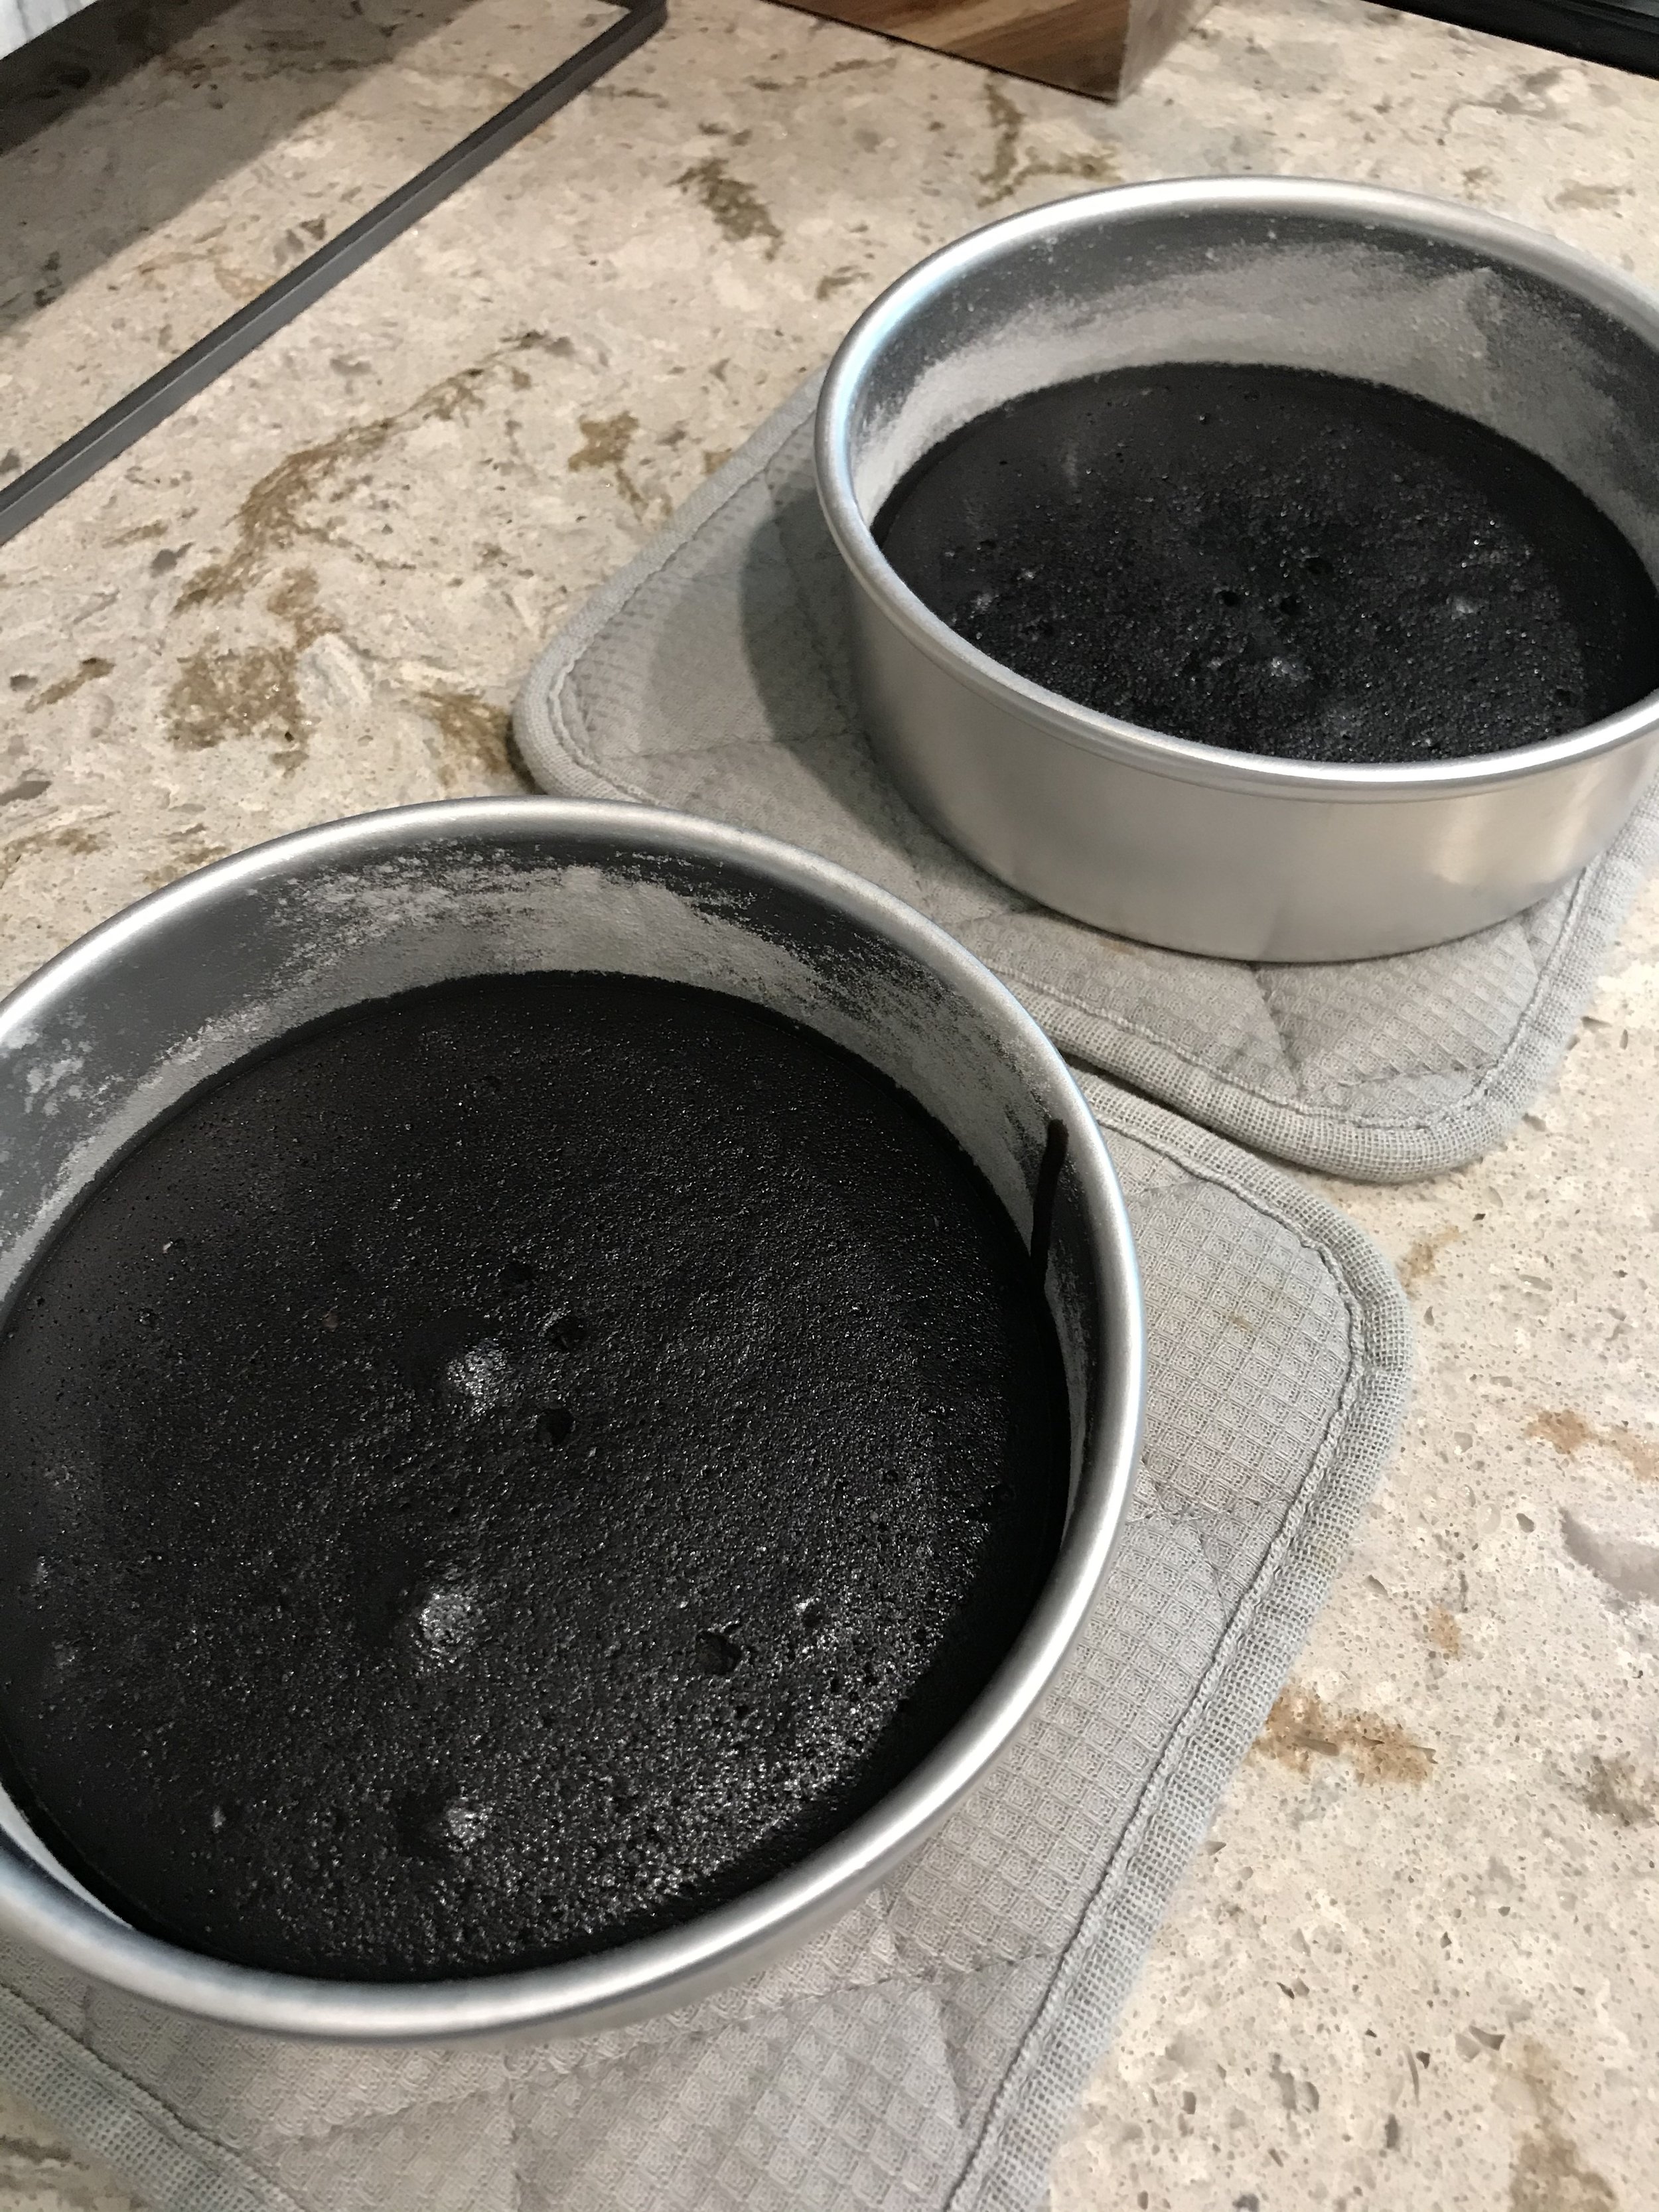
I started off with the white cake layer because it was just a single layer. This layer actually came out a bit denser than the two chocolate layers and I believe it was because I had over-creamed the butter. Instead of stopping the mixer when the creamed butter and sugar were still like dry clumps, I had let it run until it looked a bit more wet. (I forgot to check what it was supposed to look like in the video before proceeding with this step. Rookie mistake!) The added density in the cake wasn’t bad, but I definitely liked the fluffiness of the chocolate layers better. I had learned from my mistake with the white cake layer and was more mindful with the chocolate layers.

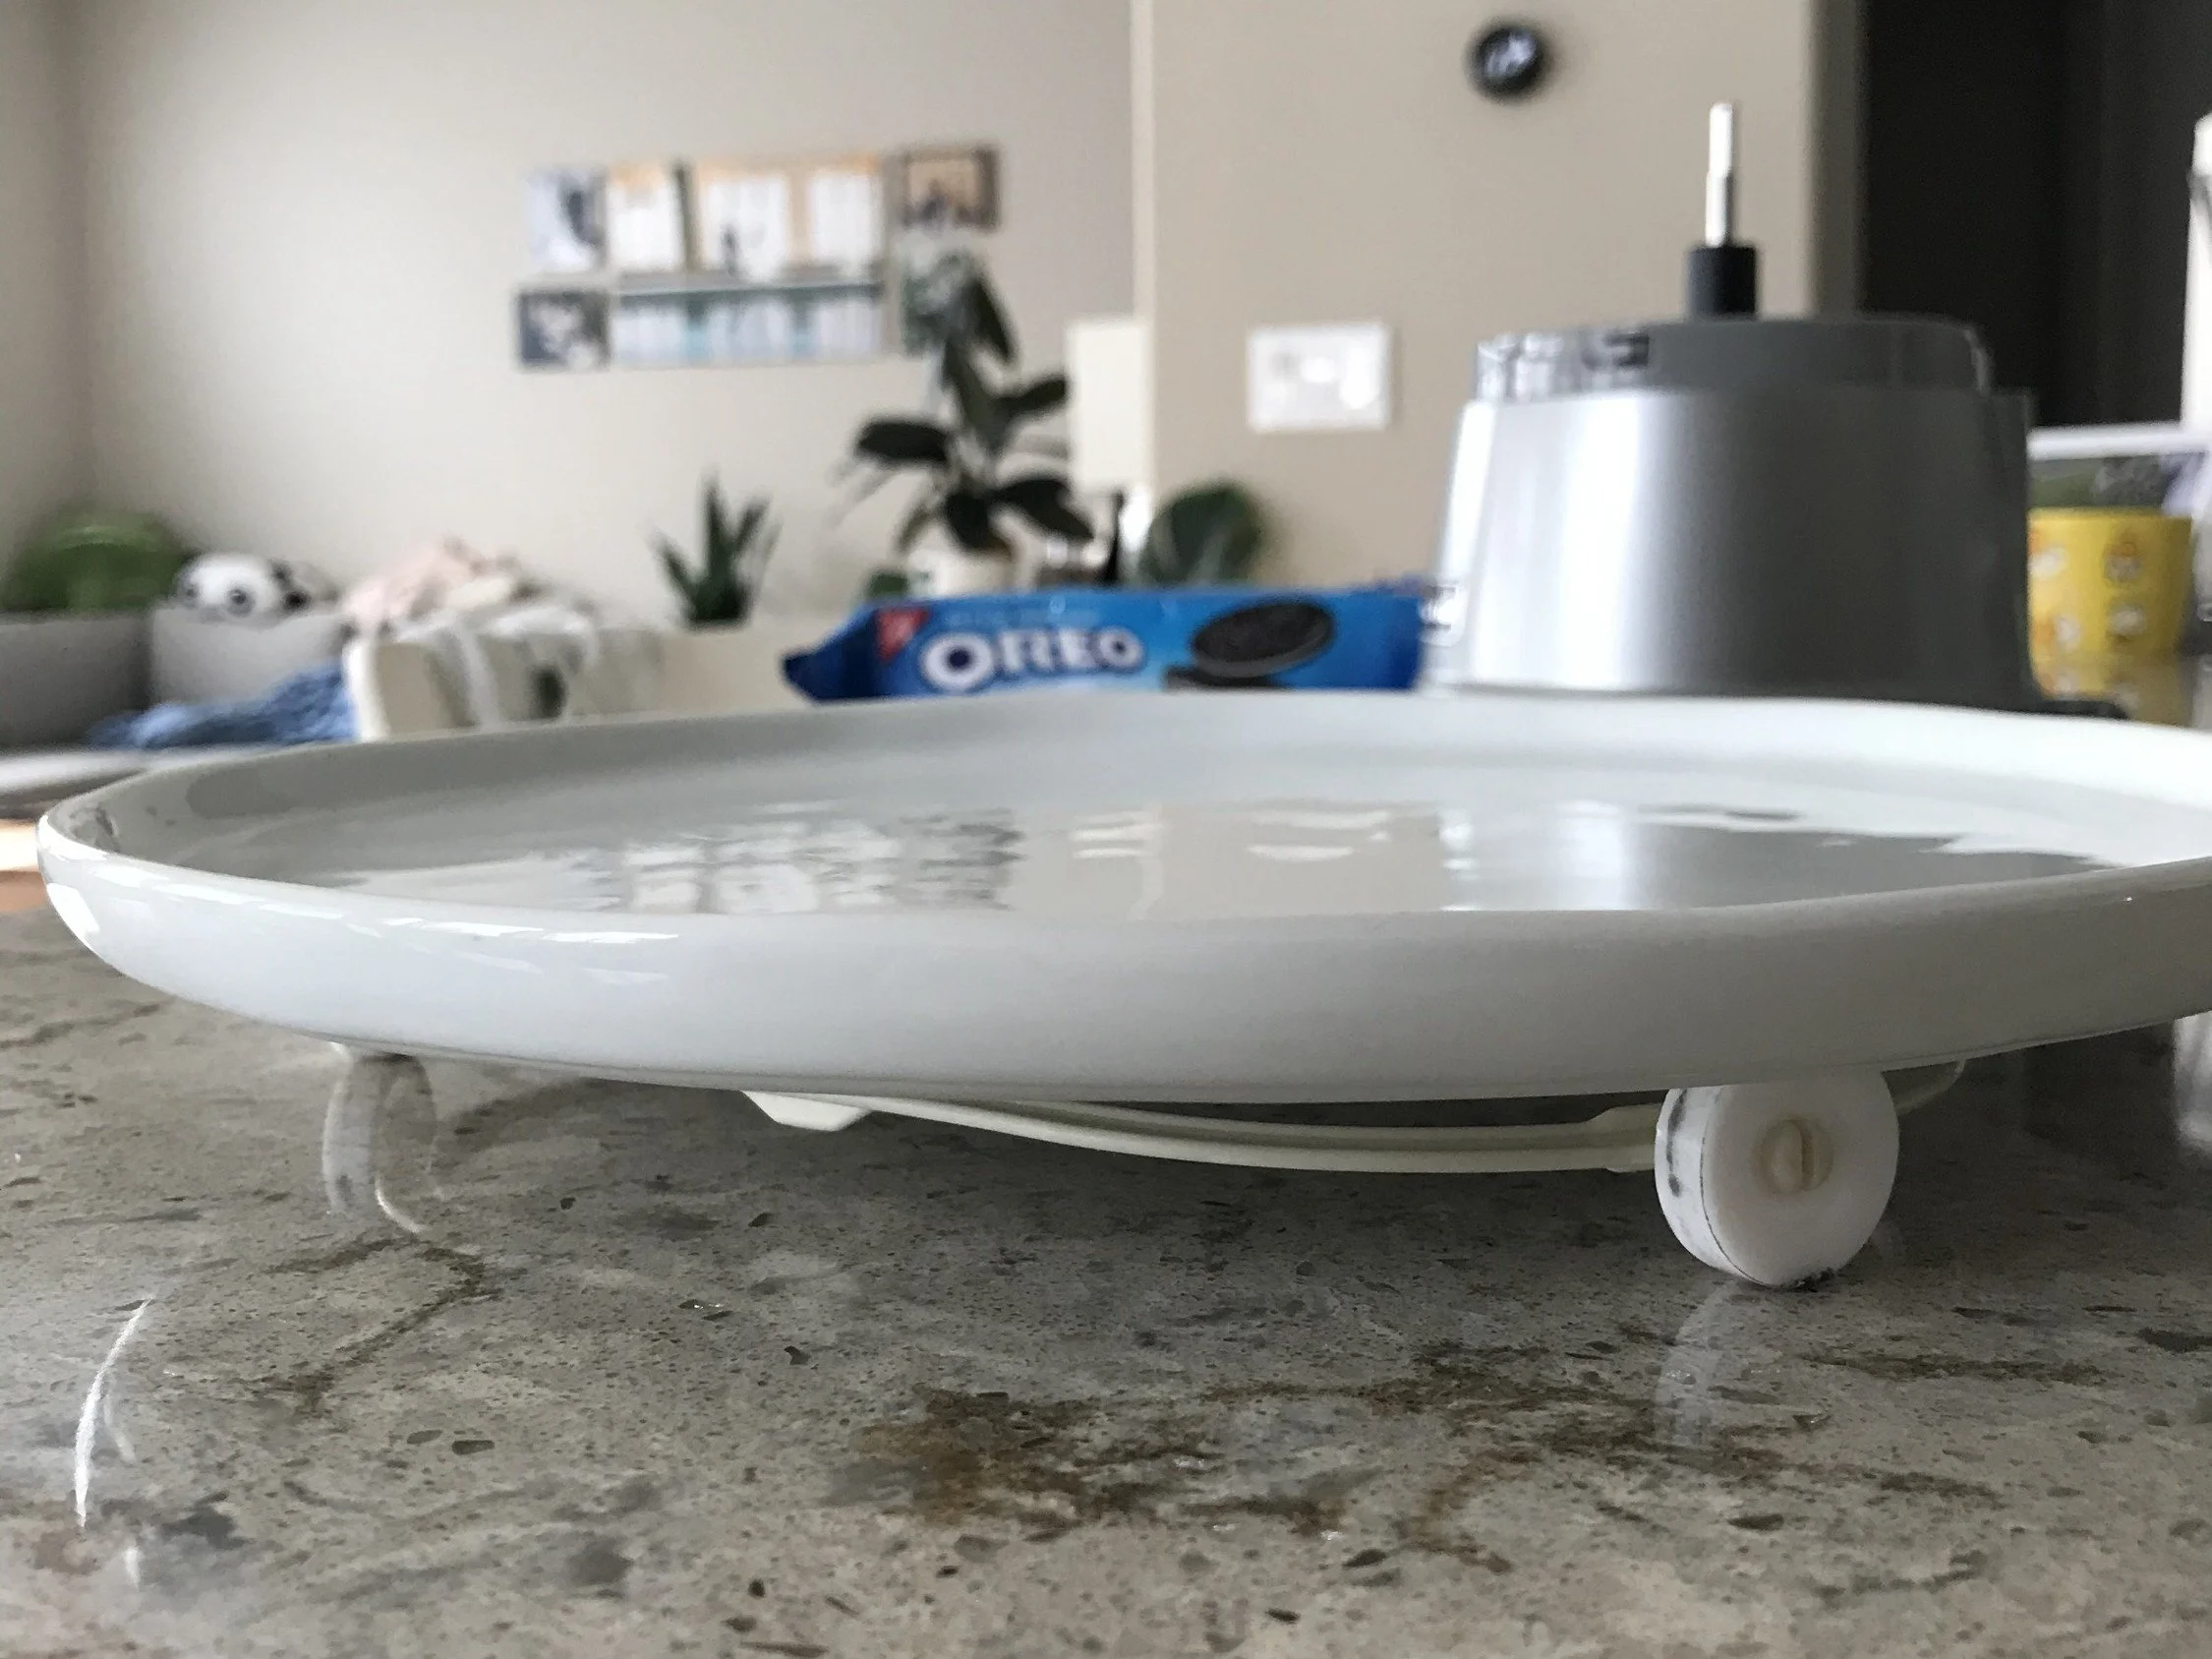
Now it’s time for a kitchen hack! If you’re like me and you’re not really a serial baker, you most likely don’t have all the cool kitchen tools that make baking fun. In my case, I lack a cake turner. I considered buying one, but then I thought about how often I would realistically bake cakes and had to figure out how and where to store it so I decided against it. Instead, I let creativity (and my boyfriend’s great ideas!) lead me to my very own economical, compact, and multi-use cake turner: the microwave roller wheel and a plate! It’s easy to store because it’s already stored in your microwave, and you can just take it out, put a plate on top of it, and you’re off to the races! I was so happy with how smoothly it turned and how easily it mimicked a real cake turner that there’s now no way I’m going to splurge on a real one.
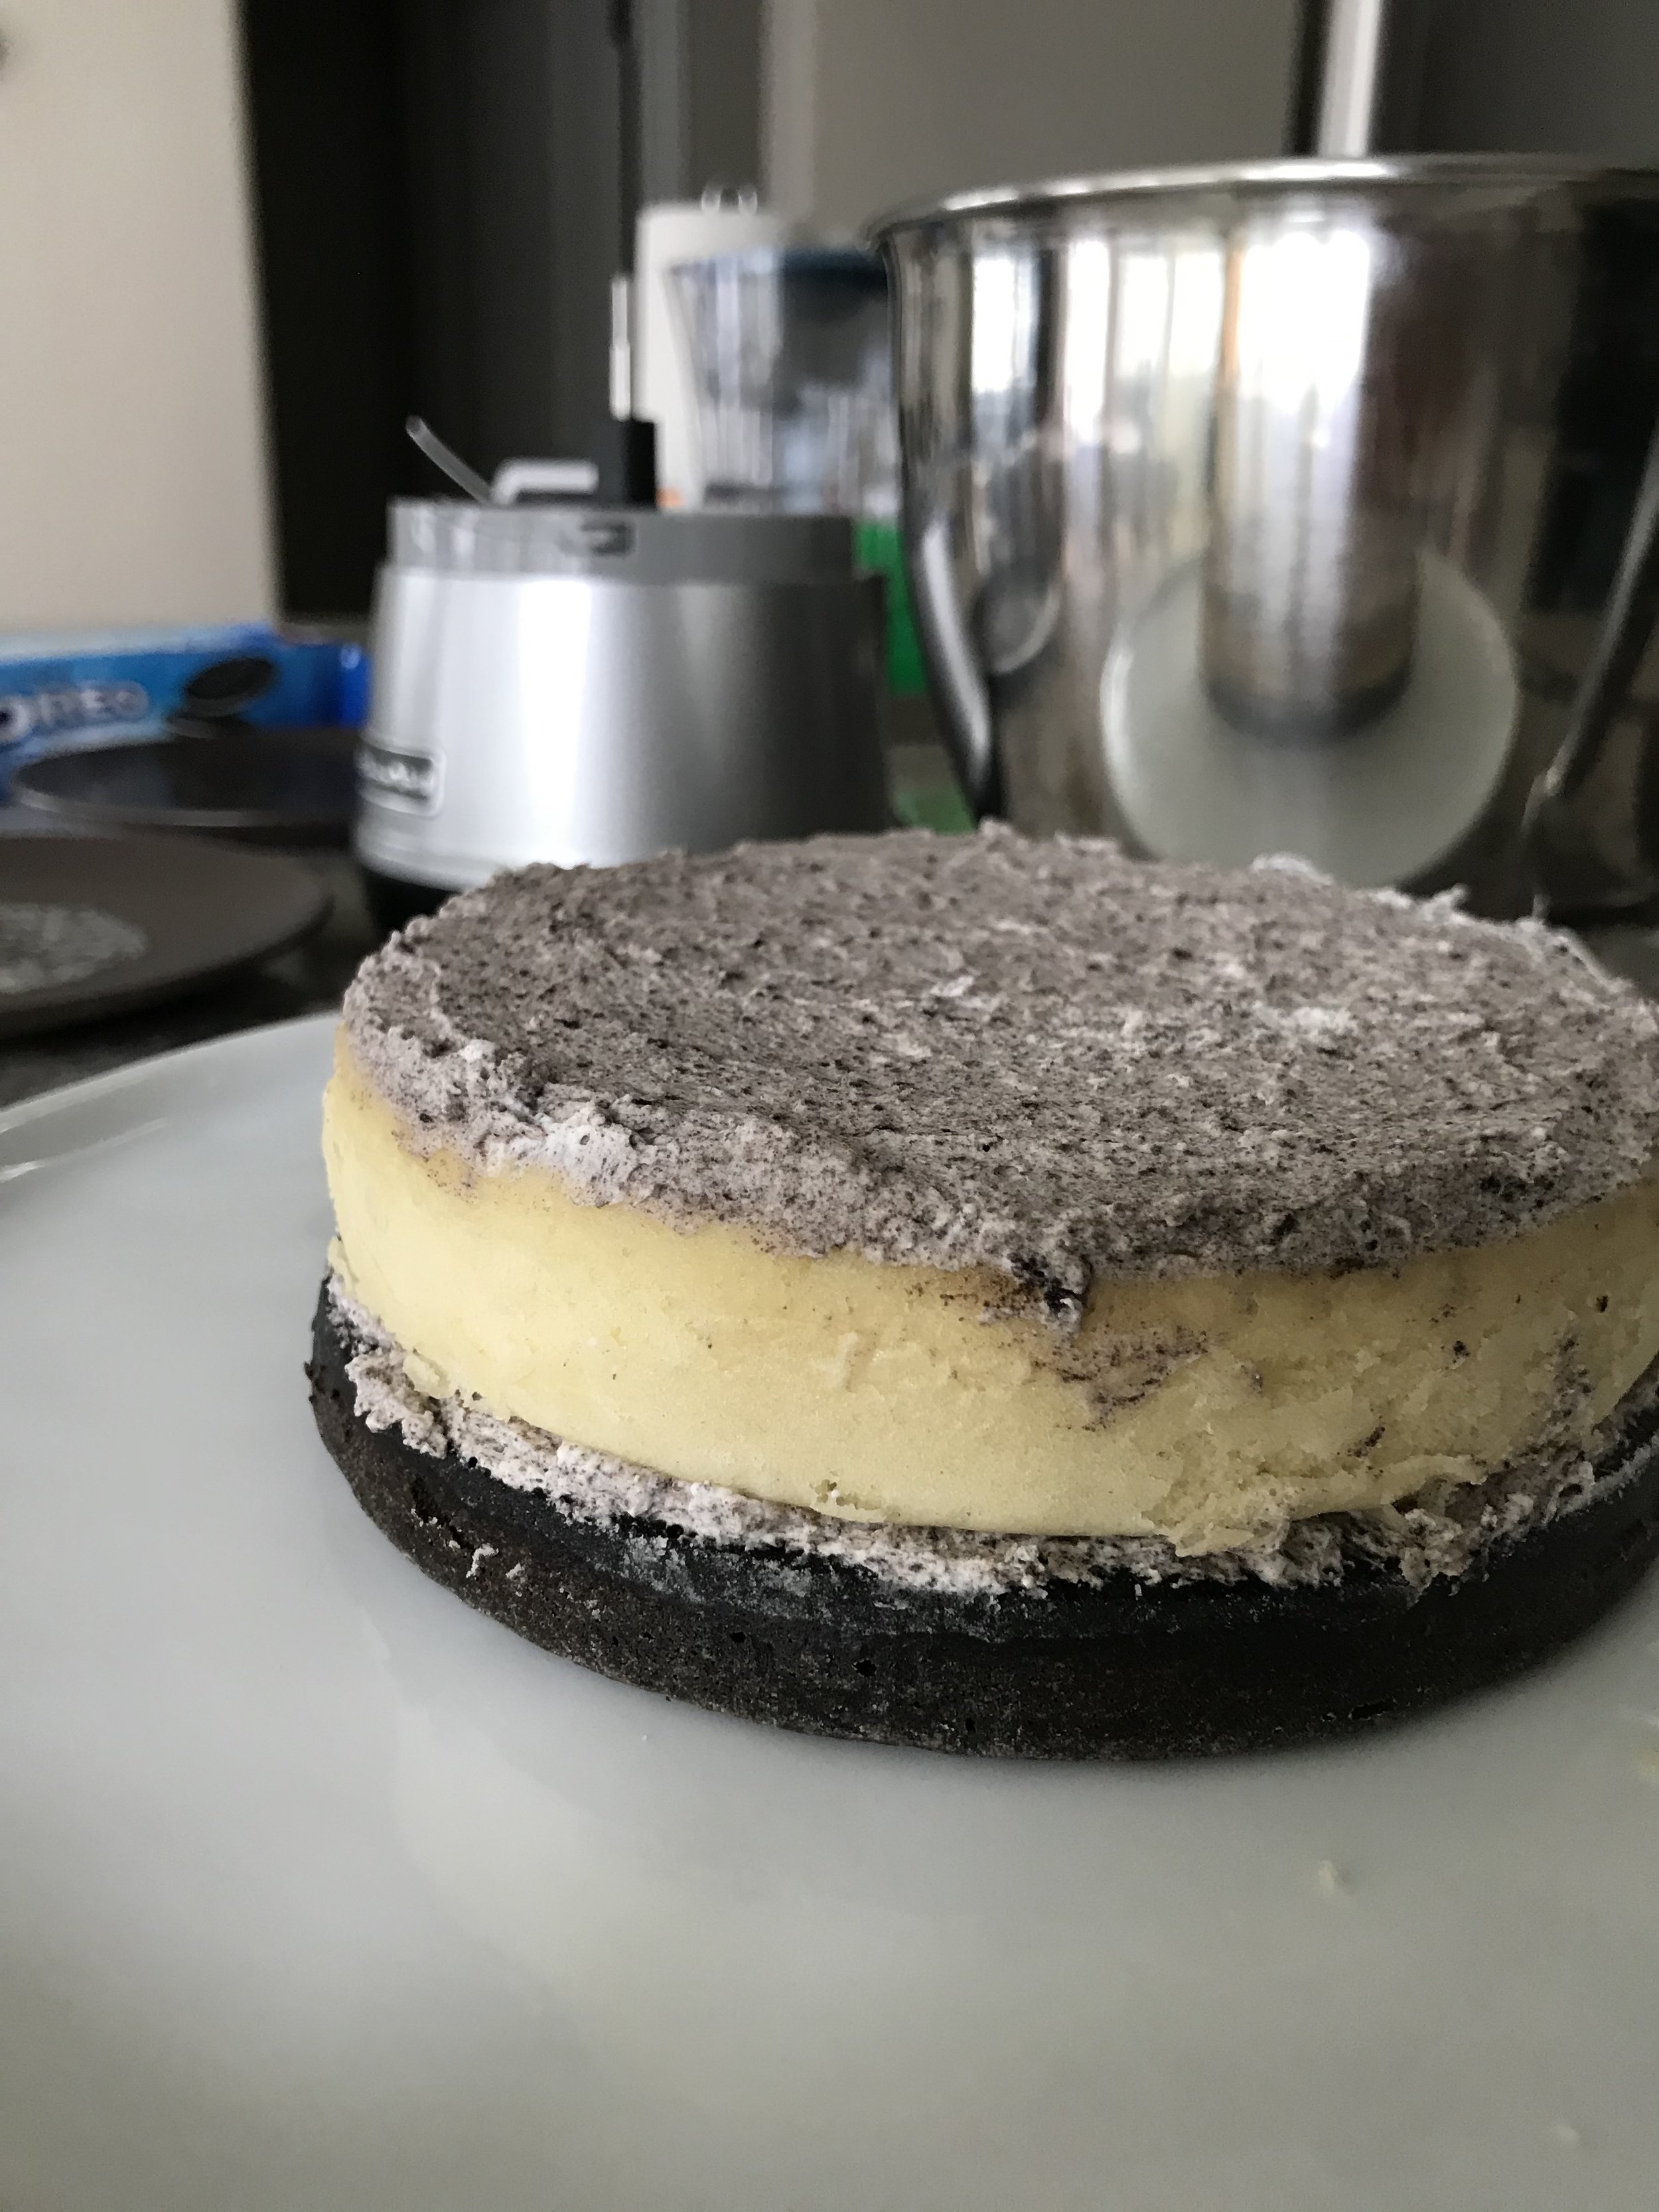
Instead of the traditional buttercream that people usually use on layer cakes, I like to opt for whipped cream because it has a lighter texture which I prefer. For this recipe, I made my whipped cream with crushed Oreos for a cookies & cream whipped cream! Layering up is definitely one of the fun parts of baking, though it’s pretty difficult to get smooth when you (again) don’t have the baking tools that make this easier. I did my best though!

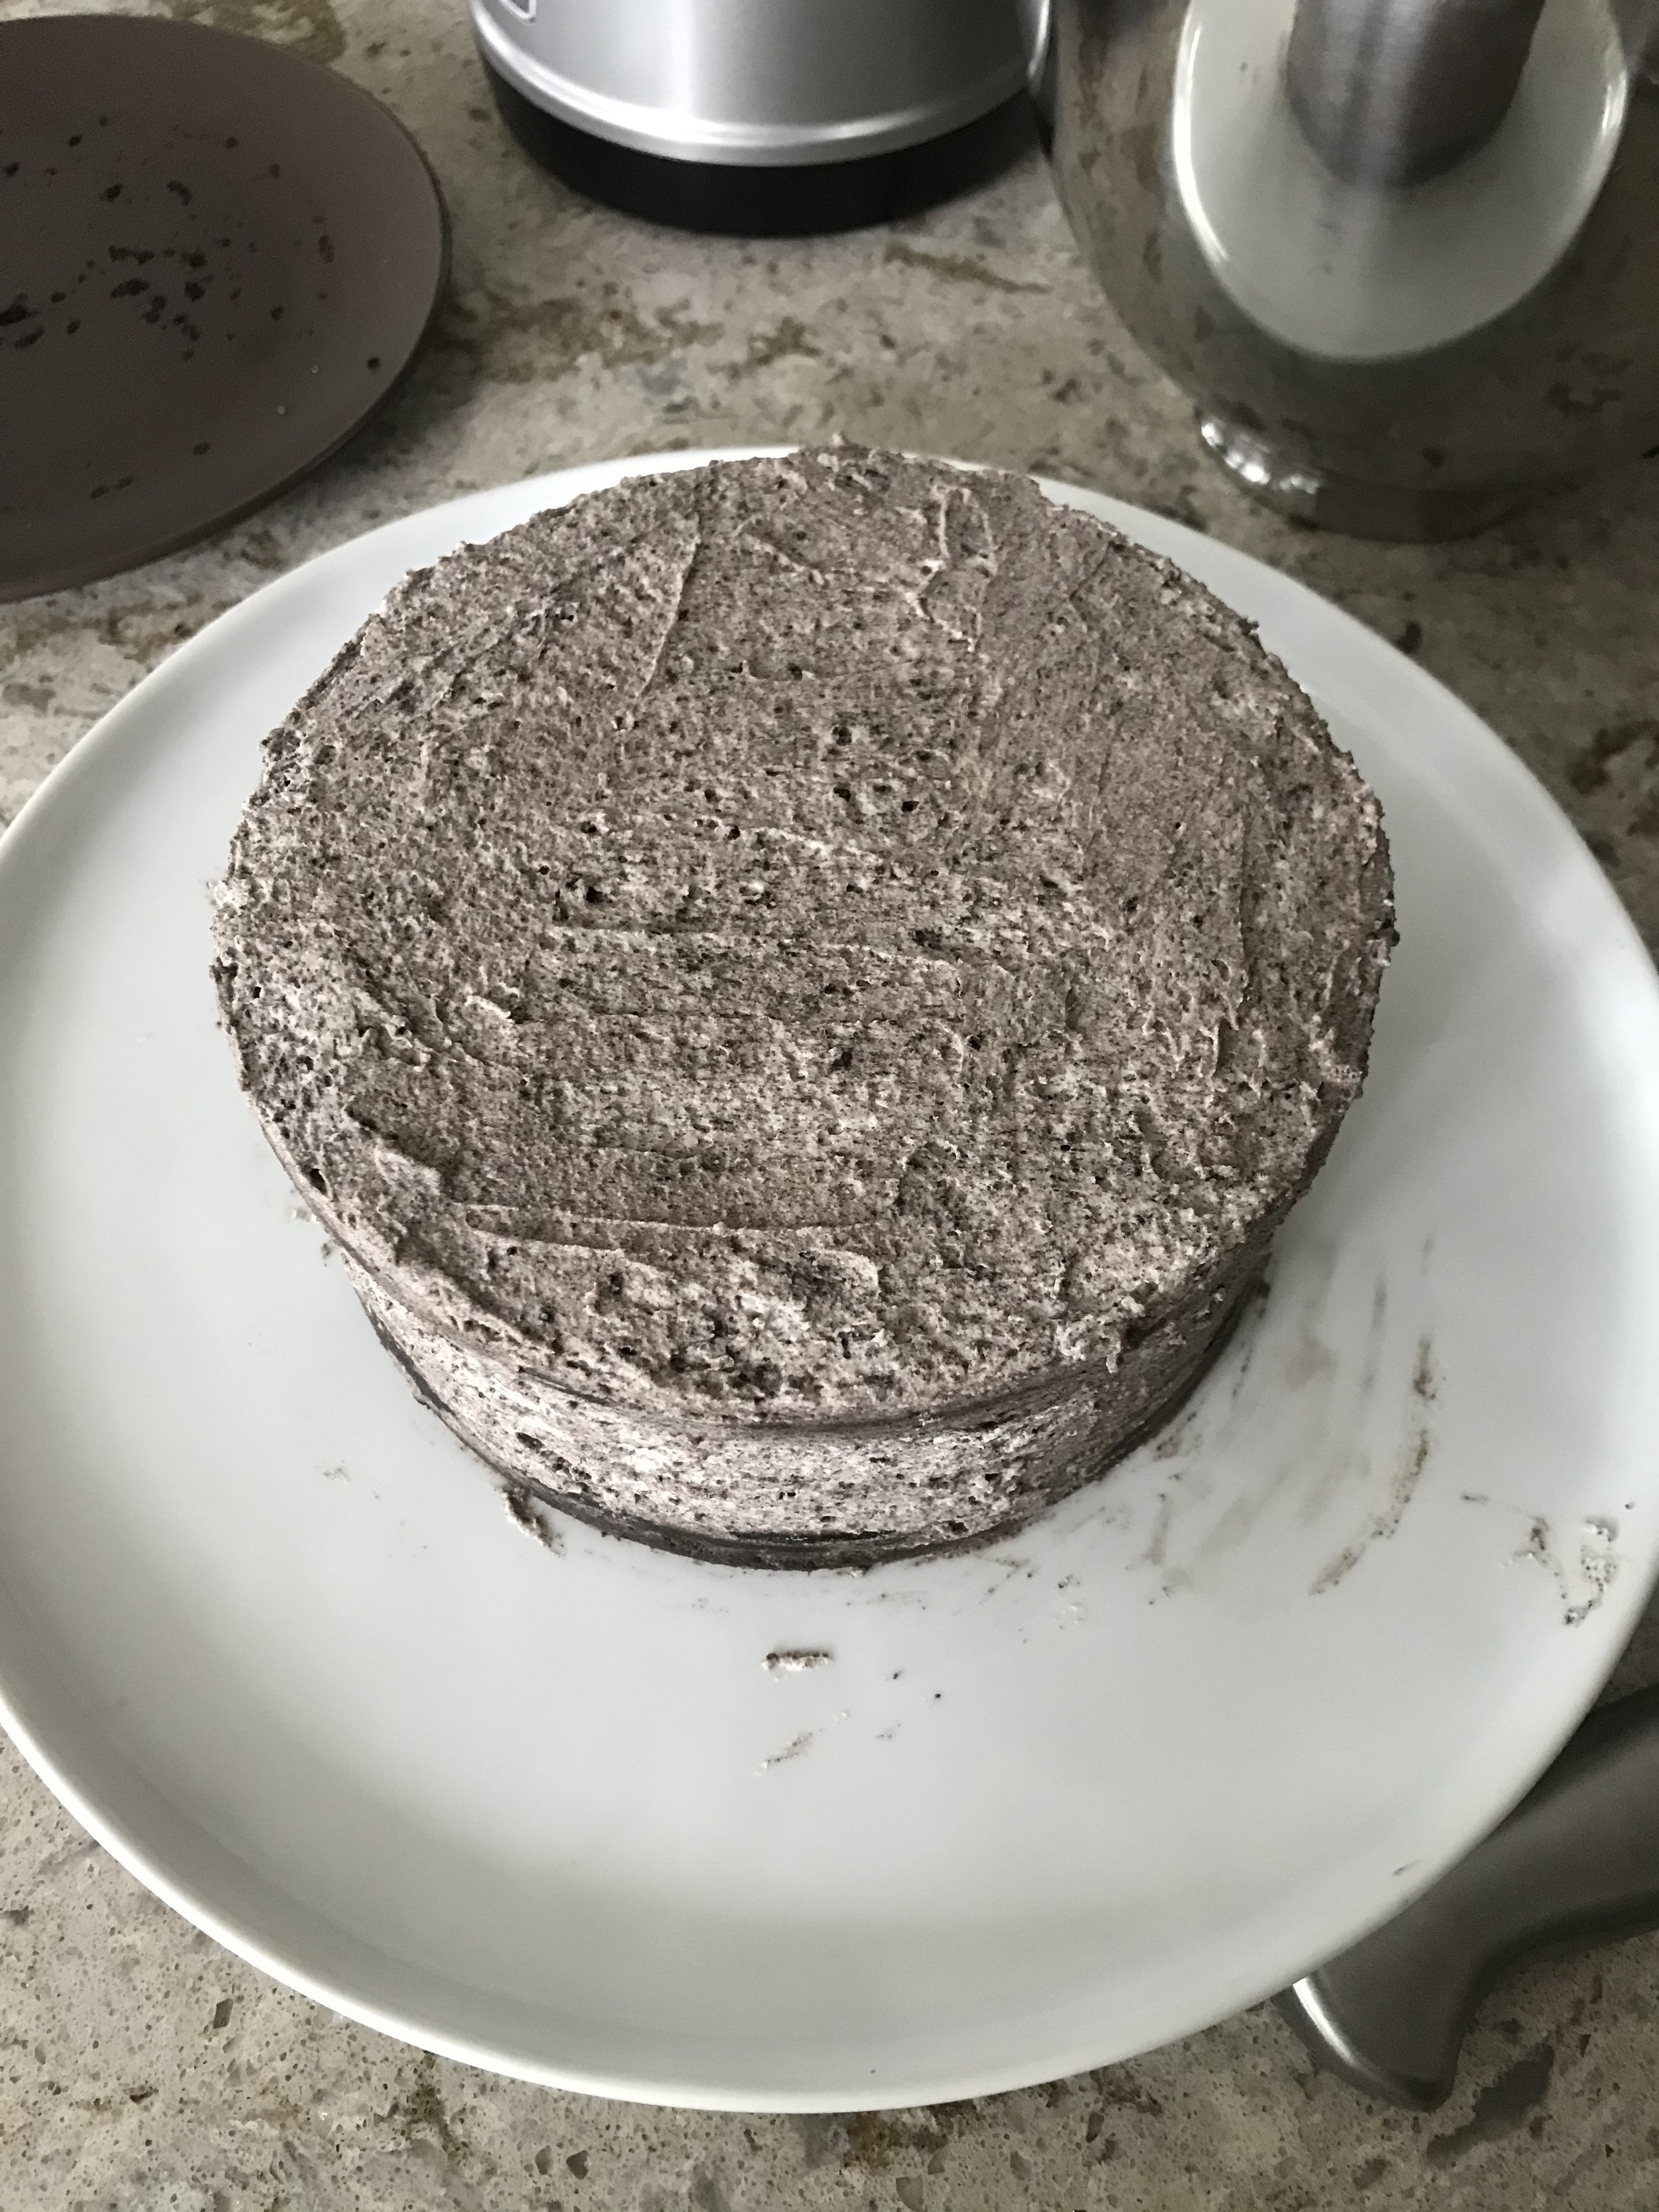
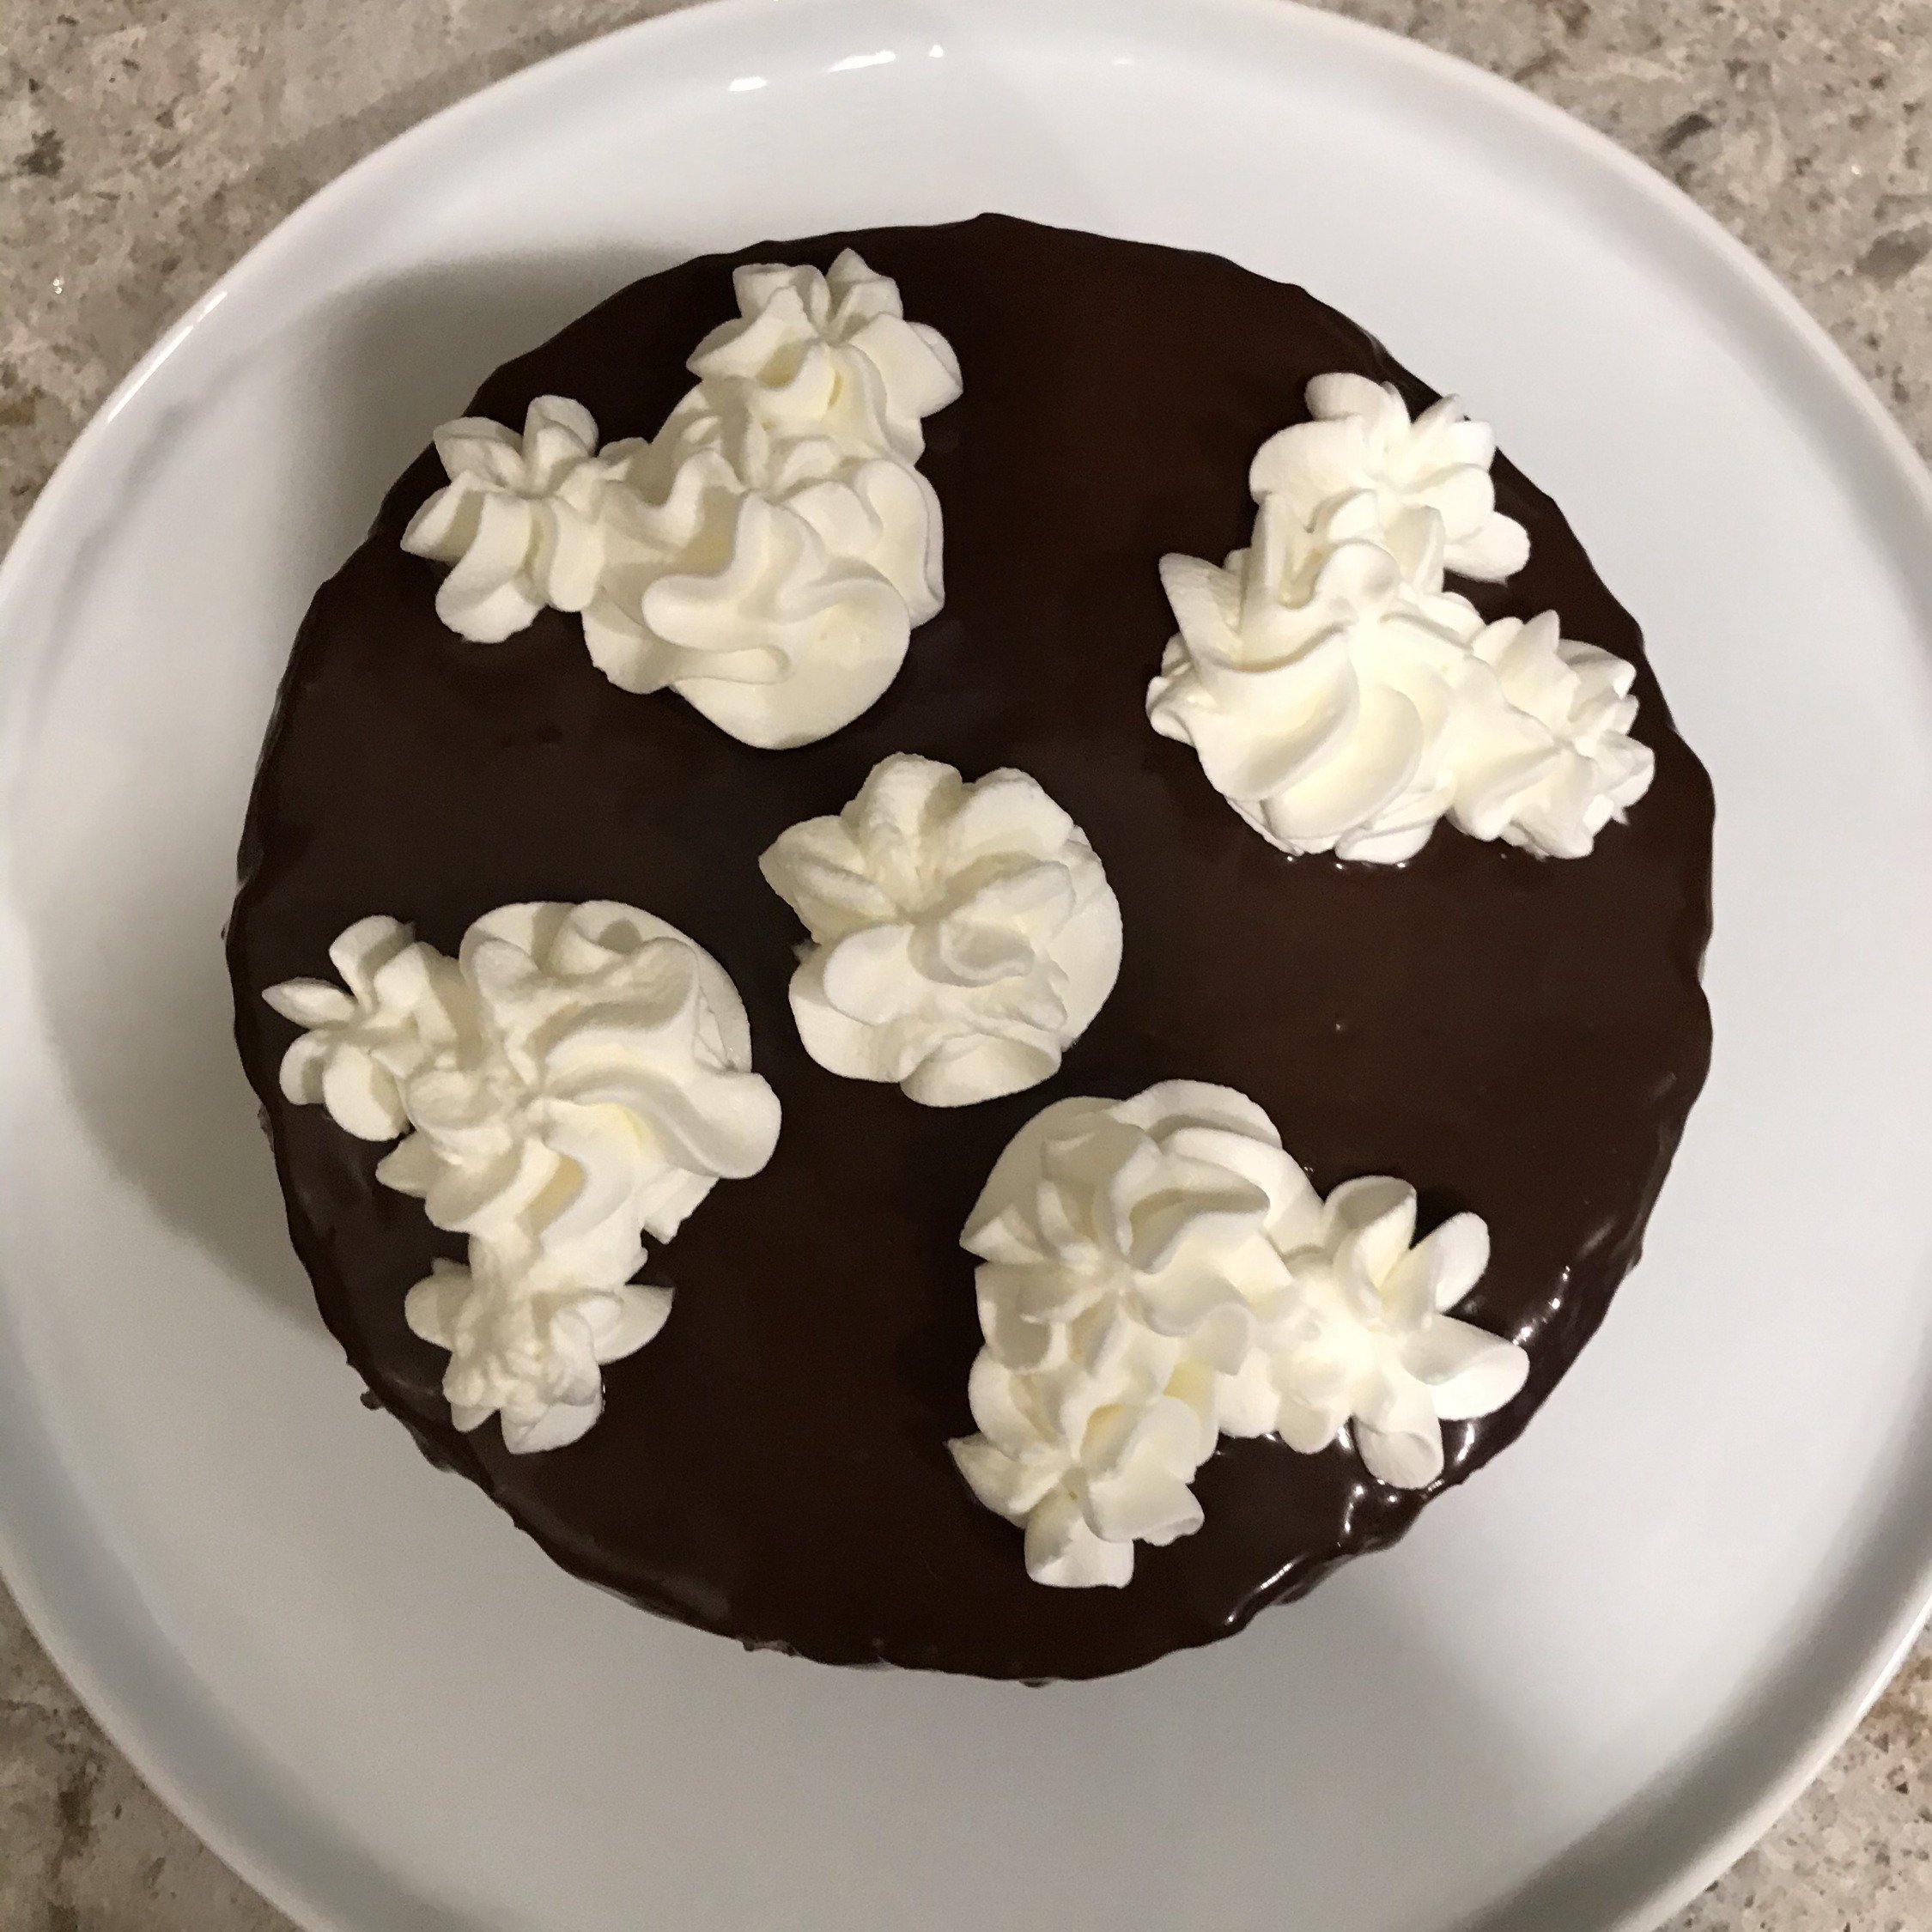
The next step that makes this cake look even more delicious is the chocolate drip! I made a dark chocolate ganache and allowed it to cool until it was thick but still somewhat runny. You want it to be thick enough that it doesn’t just drop all the way to the bottom of the plate, that way you get the cool droplets along the side.

For our final steps, the toppings, you know I had to get some Hidden Mickeys in there!

The Results
And voila, my Oreo layer cake is complete! This cake actually turned out waaaay better than I was expecting it to. It looked amazing, and it actually tasted like Oreos! (I picked the right dutch cocoa, yay!)

And there you have it, Oreo can be just as delicious in cake form!
Oreo Layer Cake
Ingredients:
White Layer
ºoº 185 g all-purpose flour
ºoº 1 1/2 eggs
ºoº 83 g milk
ºoº 56 g milk
ºoº 40g vegetable oil
ºoº 1/8 tsp baking soda
ºoº 1 1/2 tsp baking powder
ºoº 57.5g softened salted butter
ºoº 57.5g greek yogurt
ºoº 1 1/2 tsp vanilla
ºoº 185 g sugar
ºoº 1/4 tsp salt
Chocolate Layers
ºoº 183 g all-purpose flour
ºoº 300 g brown sugar
ºoº 60 g dutch cocoa
ºoº 3 g baking soda
ºoº 62.5 g softened salted butter
ºoº 62.5 g greek yogurt
ºoº 2 g instant coffee
ºoº 185 g warm water
ºoº 2 eggs
ºoº 60 g vegetable oil
ºoº 1 tsp vanilla
ºoº 16.2 g white vinegar
ºoº 113.8 g milk
Whipped Cream
ºoº 1/2 cup heavy whipping cream
ºoº 1 tbsp sugar
ºoº 5 crushed Oreos (or more or less depending on your preference)
Dark Chocolate Ganache
ºoº 1/4 cup heavy whipping cream
ºoº 4 oz semi-sweet chocolate chips
Directions:
White Layer
1. Lightly grease your cake pan and coat with flour (I used a 6" cake pan)
2. Preheat the oven to 350F
3. Mix together the flour, sugar, baking soda, baking powder, and salt
4. Separately mix together the 56 g milk with the vegetable oil
5. Separately mix together the 83 g milk with the eggs and vanilla
6. Beat the butter into the dry ingredients one tablespoon at a time until it looks like breadcrumbs
7. Gradually mix in both wet mixtures
8. Pour into the cake pan and bake for 15-20 minutes until a toothpick comes out clean
Chocolate Layer
Lightly grease your cake pans and coat with flour (I used two 6" cake pans)
Preheat the oven to 350F
Prepare the buttermilk substitute by mixing together the vinegar and milk. Allow this to sit for at least 5-10 minutes so it can curdle
Mix together the flour, brown sugar, cocoa powder, and baking soda
Dissolve the instant coffee in the warm water
Beat the eggs and oil into the coffee
Mix the wet mixture into the dry ingredients
Mix in the butter
After the batter color lightens (~1 minute) mix in the buttermilk
Split into the two cake pans and bake for 15-20 minutes until a toothpick comes out clean
Whipped Cream
Before whipping the cream, make sure to chill your mixing bowl (freezer works best!)
Beat the whipping cream until it begins to thicken, then add the sugar. Don't whip for too long, otherwise the cream can become lumpy
After the whipped cream is the texture you like, scoop out some whipped cream into a piping bag and save for the topping. Fold the crushed Oreos into the remaining cream until it's evenly distributed
Ganache
Heat the whipping cream to a light simmer
Pour the heated cream over the chocolate chips and let it sit for a couple minutes
Stir the mixture together to fully melt the chocolate and incorporate the cream
Assembly
Frost the layers starting with the chocolate layer at the bottom and the white layer in the middle
Chill the cake so that the outer cream frosting is firm
Scoop the ganache onto the top of the cake and use the spoon to lightly spread the ganache in a circular fashion so that it can drop over the sides
Smooth the top and allow the cake to cool so the ganache is firm
Pipe the white whipped cream in dollops around the top. Place Oreos on each dollop
Notes:
ºoº You can bake all 3 cake layers at once if you have the tools for it (3 cake pans), otherwise you can
bake them separately
ºoº I substituted half the butter content in the original recipe with greek yogurt in order to reduce
some of the fat content without risking altering the texture of the cake. You could potentially
substitute butter with greek yogurt 1:1 but there are some other required adjustments to make up
for the increased wetness of the yogurt
ºoº Feel free to swap out the dark chocolate for any other kind of chocolate you like. If you
want to swap out the heavy whipping cream be aware that you'll need something with
a similar fat content to create the thick texture