
Taro Matcha Nian Gao Recipe
Lunar New Year has always been a big celebration in my family. Since I was a kid, this was always the holiday that I looked most forward to! This celebration is most known for its tradition of giving and receiving lucky red envelopes to indicate a hope for prosperity in the new year.
But my all-time favorite part is the FEAST that’s essential to all our celebrations. There are so many delicious foods that are staples to Lunar New Year that both taste amazing and are symbolic to this holiday!
Click here to skip straight to the recipe!
Nian Gao During Lunar New Year
Nian gao is a steamed sticky rice cake that is popularly eaten around Lunar New Year because the sound of the words sound similar to “year tall” in Chinese. Many of the foods that are eaten during Lunar New Year are mostly symbolic because their names are homonyms of auspicious words mostly related to luck, prosperity, and health. The sound of the words nian gao are said to symbolize growth in the new year in terms of wealth, positions, and literal height.
I decided to create this today since it’s one of my favorites (even though they’re all so yummy). It’s easy to make and works as a dessert, a snack, or a meal! The light sweetness and chewy texture are absolutely delightful, and to top it off, it tastes even better when pan-fried with an egg!
Traditional nian gao is made with rock sugar or brown sugar, but I wanted to add a special twist to mine by giving it a couple of different flavors that are still Asian-inspired, but unique to my tastes! The traditional recipe would also call for steaming the cake in banana leaves, but since I didn’t have those on hand, I opted for a 6” cake pan.
The Ingredients
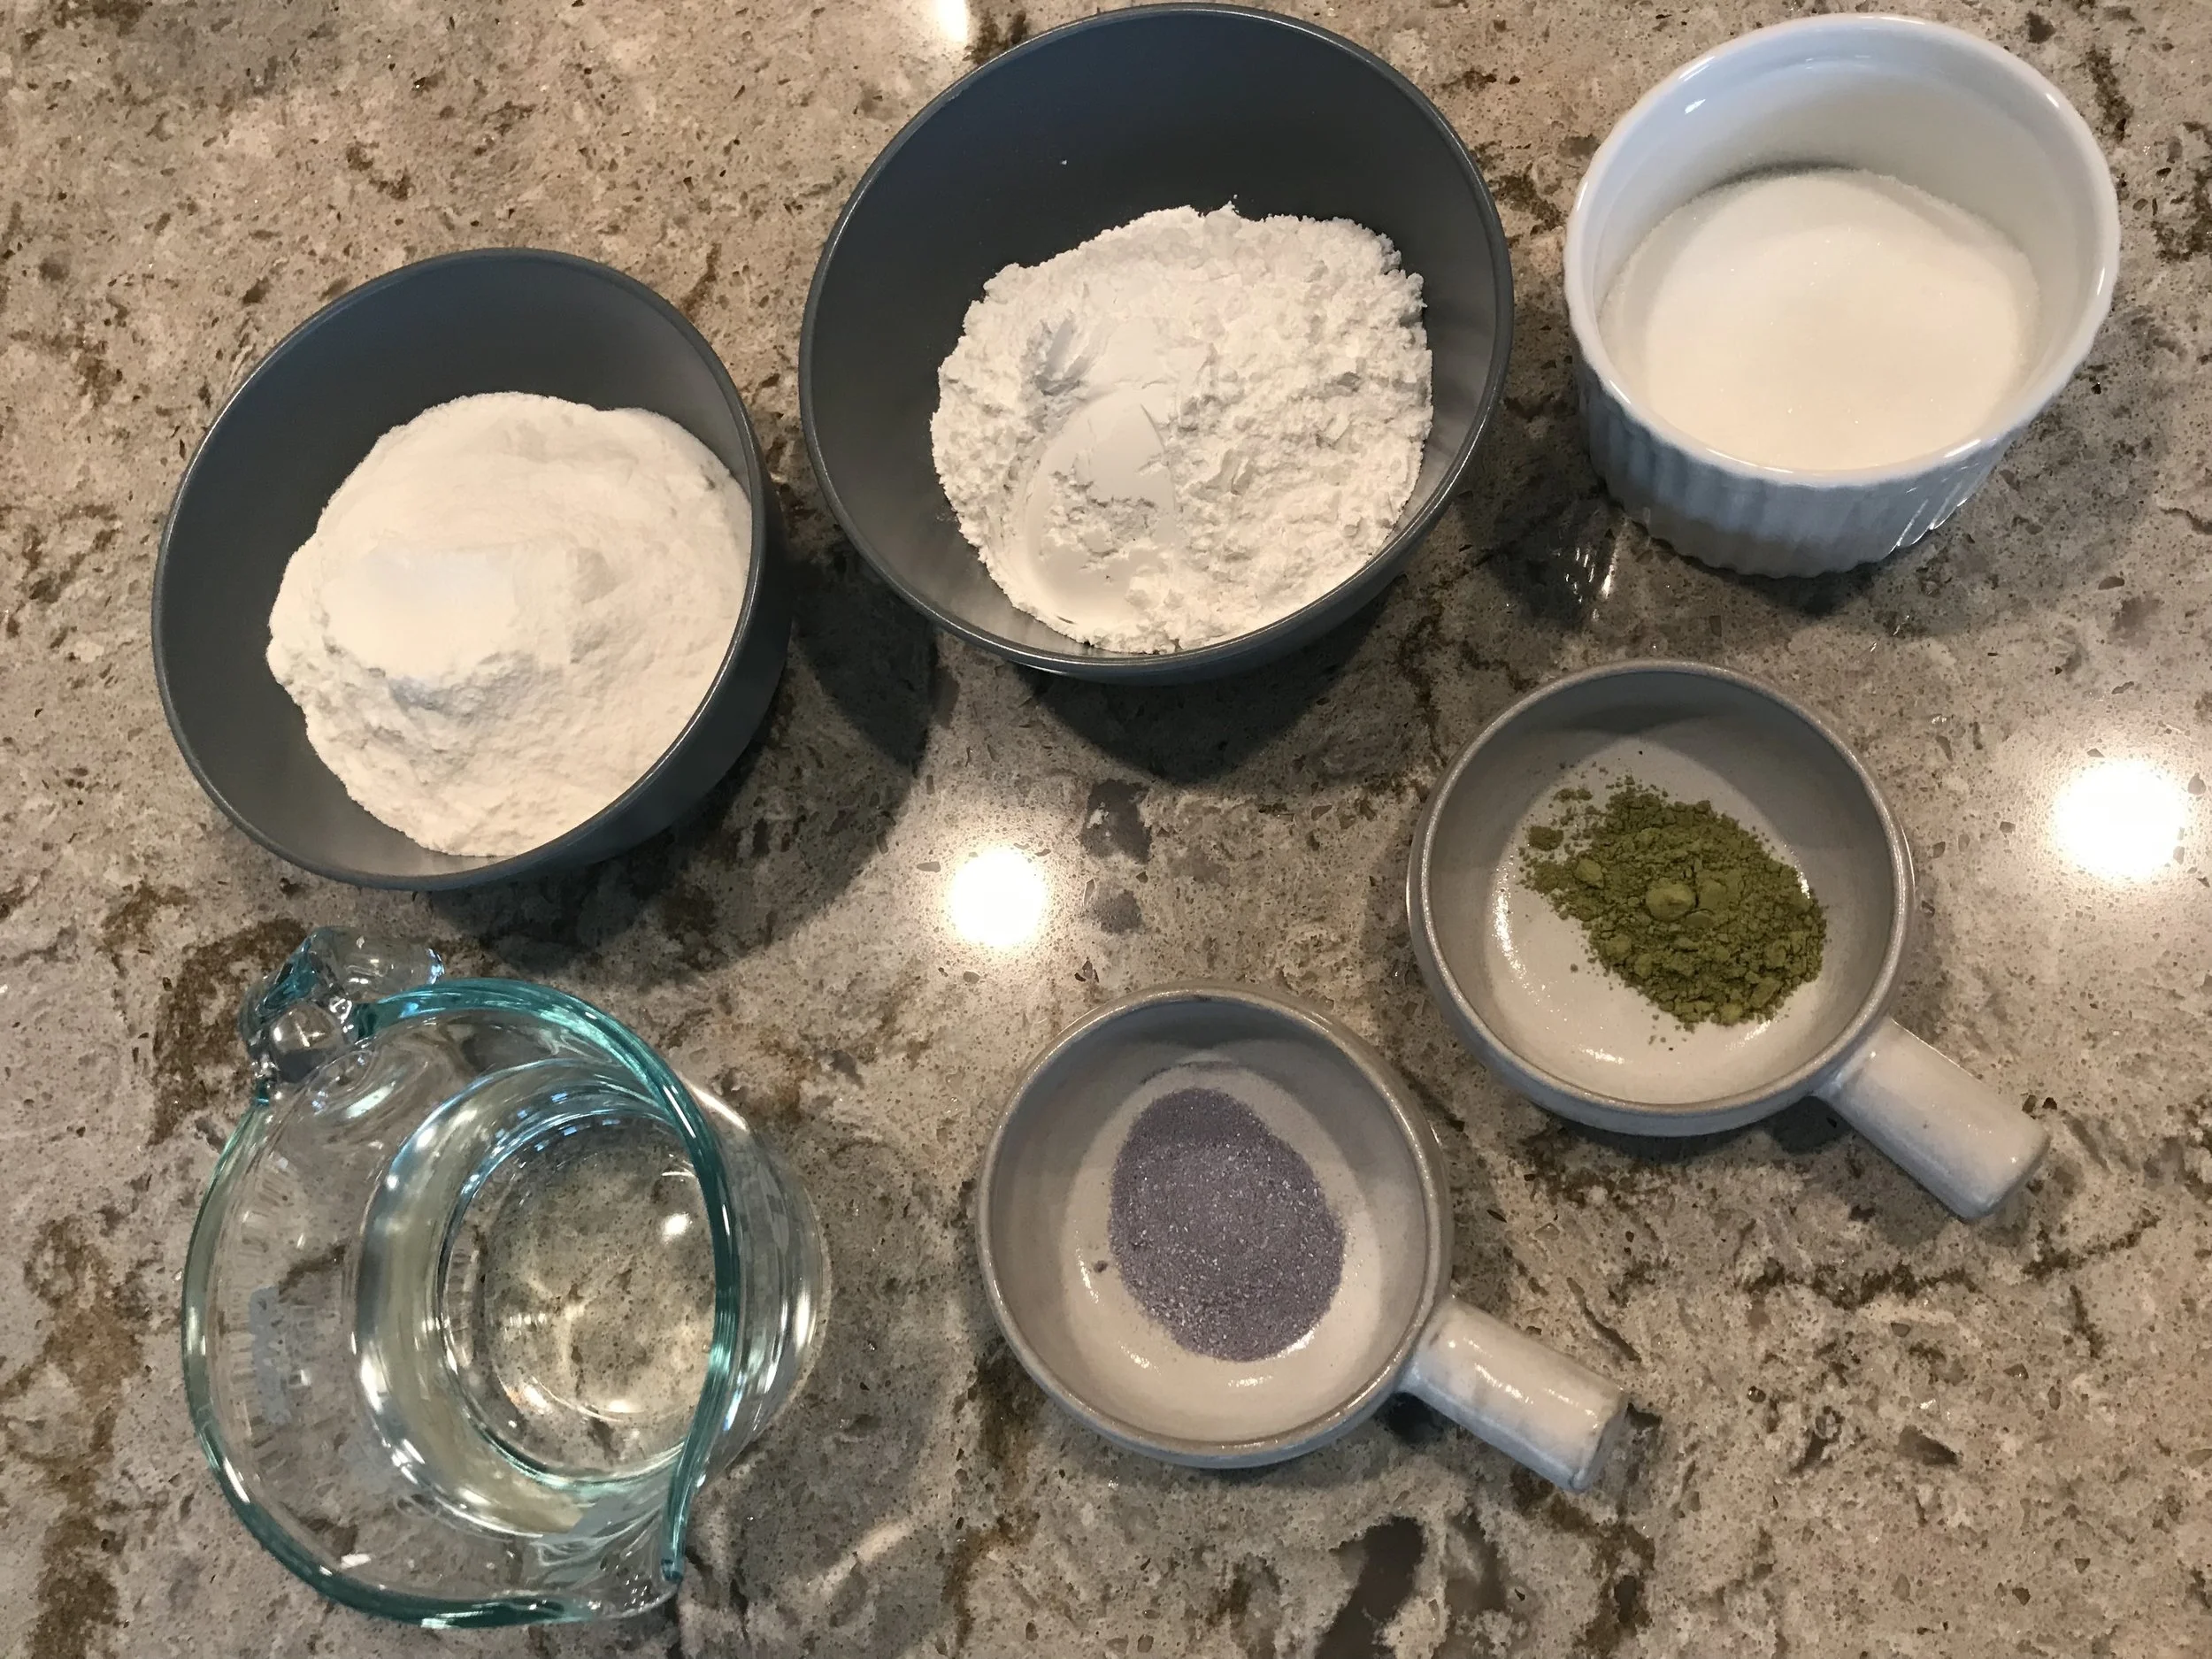
Glutinous rice flour (or sweet rice flour) and rice flour and both used in this recipe. This recipe can be made entirely with glutinous rice flour, which will result in a bit more of a thicker stickier texture. The addition of the regular rice flour loosens up the texture a bit.
The flavoring is also entirely optional! Since I wanted to have a marbled look with two of my favorite flavors, I decided to make half the batter in taro and half in matcha. If you want to make a single flavor, use a full tablespoon of the desired flavor.
The taro powder that I used is actually a bubble tea powder mix so there's additional sweetener in it. You may consider reducing the granulated sugar depending on how much taro powder you would want if you're sensitive to sweetness and don't want it too sweet. The matcha powder I used was from Costco, but you can also purchase it from Amazon if that's more convenient!
The Baking Process
I divided the rice flours in half and mixed half with match and half with taro. Setting the dry mixture aside, I heated up the water then stirred in the granulated sugar.
Next, I stirred in the sugar water into half of the dry mixture slowly until the batter was somewhat thick, but dripped ribbon-like - a similar consistency to condensed milk. Repeat for the other flavor. Each half should use up a little less than half of the sugar water, but use as much as you need to reach the right consistency. I had about a couple tablespoons of the sugar mixture leftover after finishing up both batters.

To create a marbled effect, I poured half the matcha batter in a greased cake pan, then poured half the taro batter into the pan. Then I swapped between the two until both batters were fully poured into the pan and used a spoon to swirl the batter around. Tapping the pan against the table should release most of the air bubbles that might be in the batter.
The next step is to steam the cake! Since I don’t have a traditional steamer, I used a tall pot with a few inches of water at the bottom, placed a steamer tray in the pot, then placed a plate on top of the steamer tray. You can pretty much jerry rig a makeshift steamer with whatever tools you might have or opt for a traditional steamer. If you’re using a pot, you can wrap your pot lid with a towel to make sure the condensation doesn’t drip onto the top of the cake.
Steam the cake for an hour and a half, then check the cake by poking a toothpick through the center and making sure it comes out clean. Depending on the efficiency of your steamer (especially if you’re putting together your own), you may need longer. I tacked on an additional 10-15 minutes.
Remove the cake from the steamer and allow it to cool to room temperature, then place it into the refrigerator overnight. The cake will be much easier to cut after it’s been cooled.
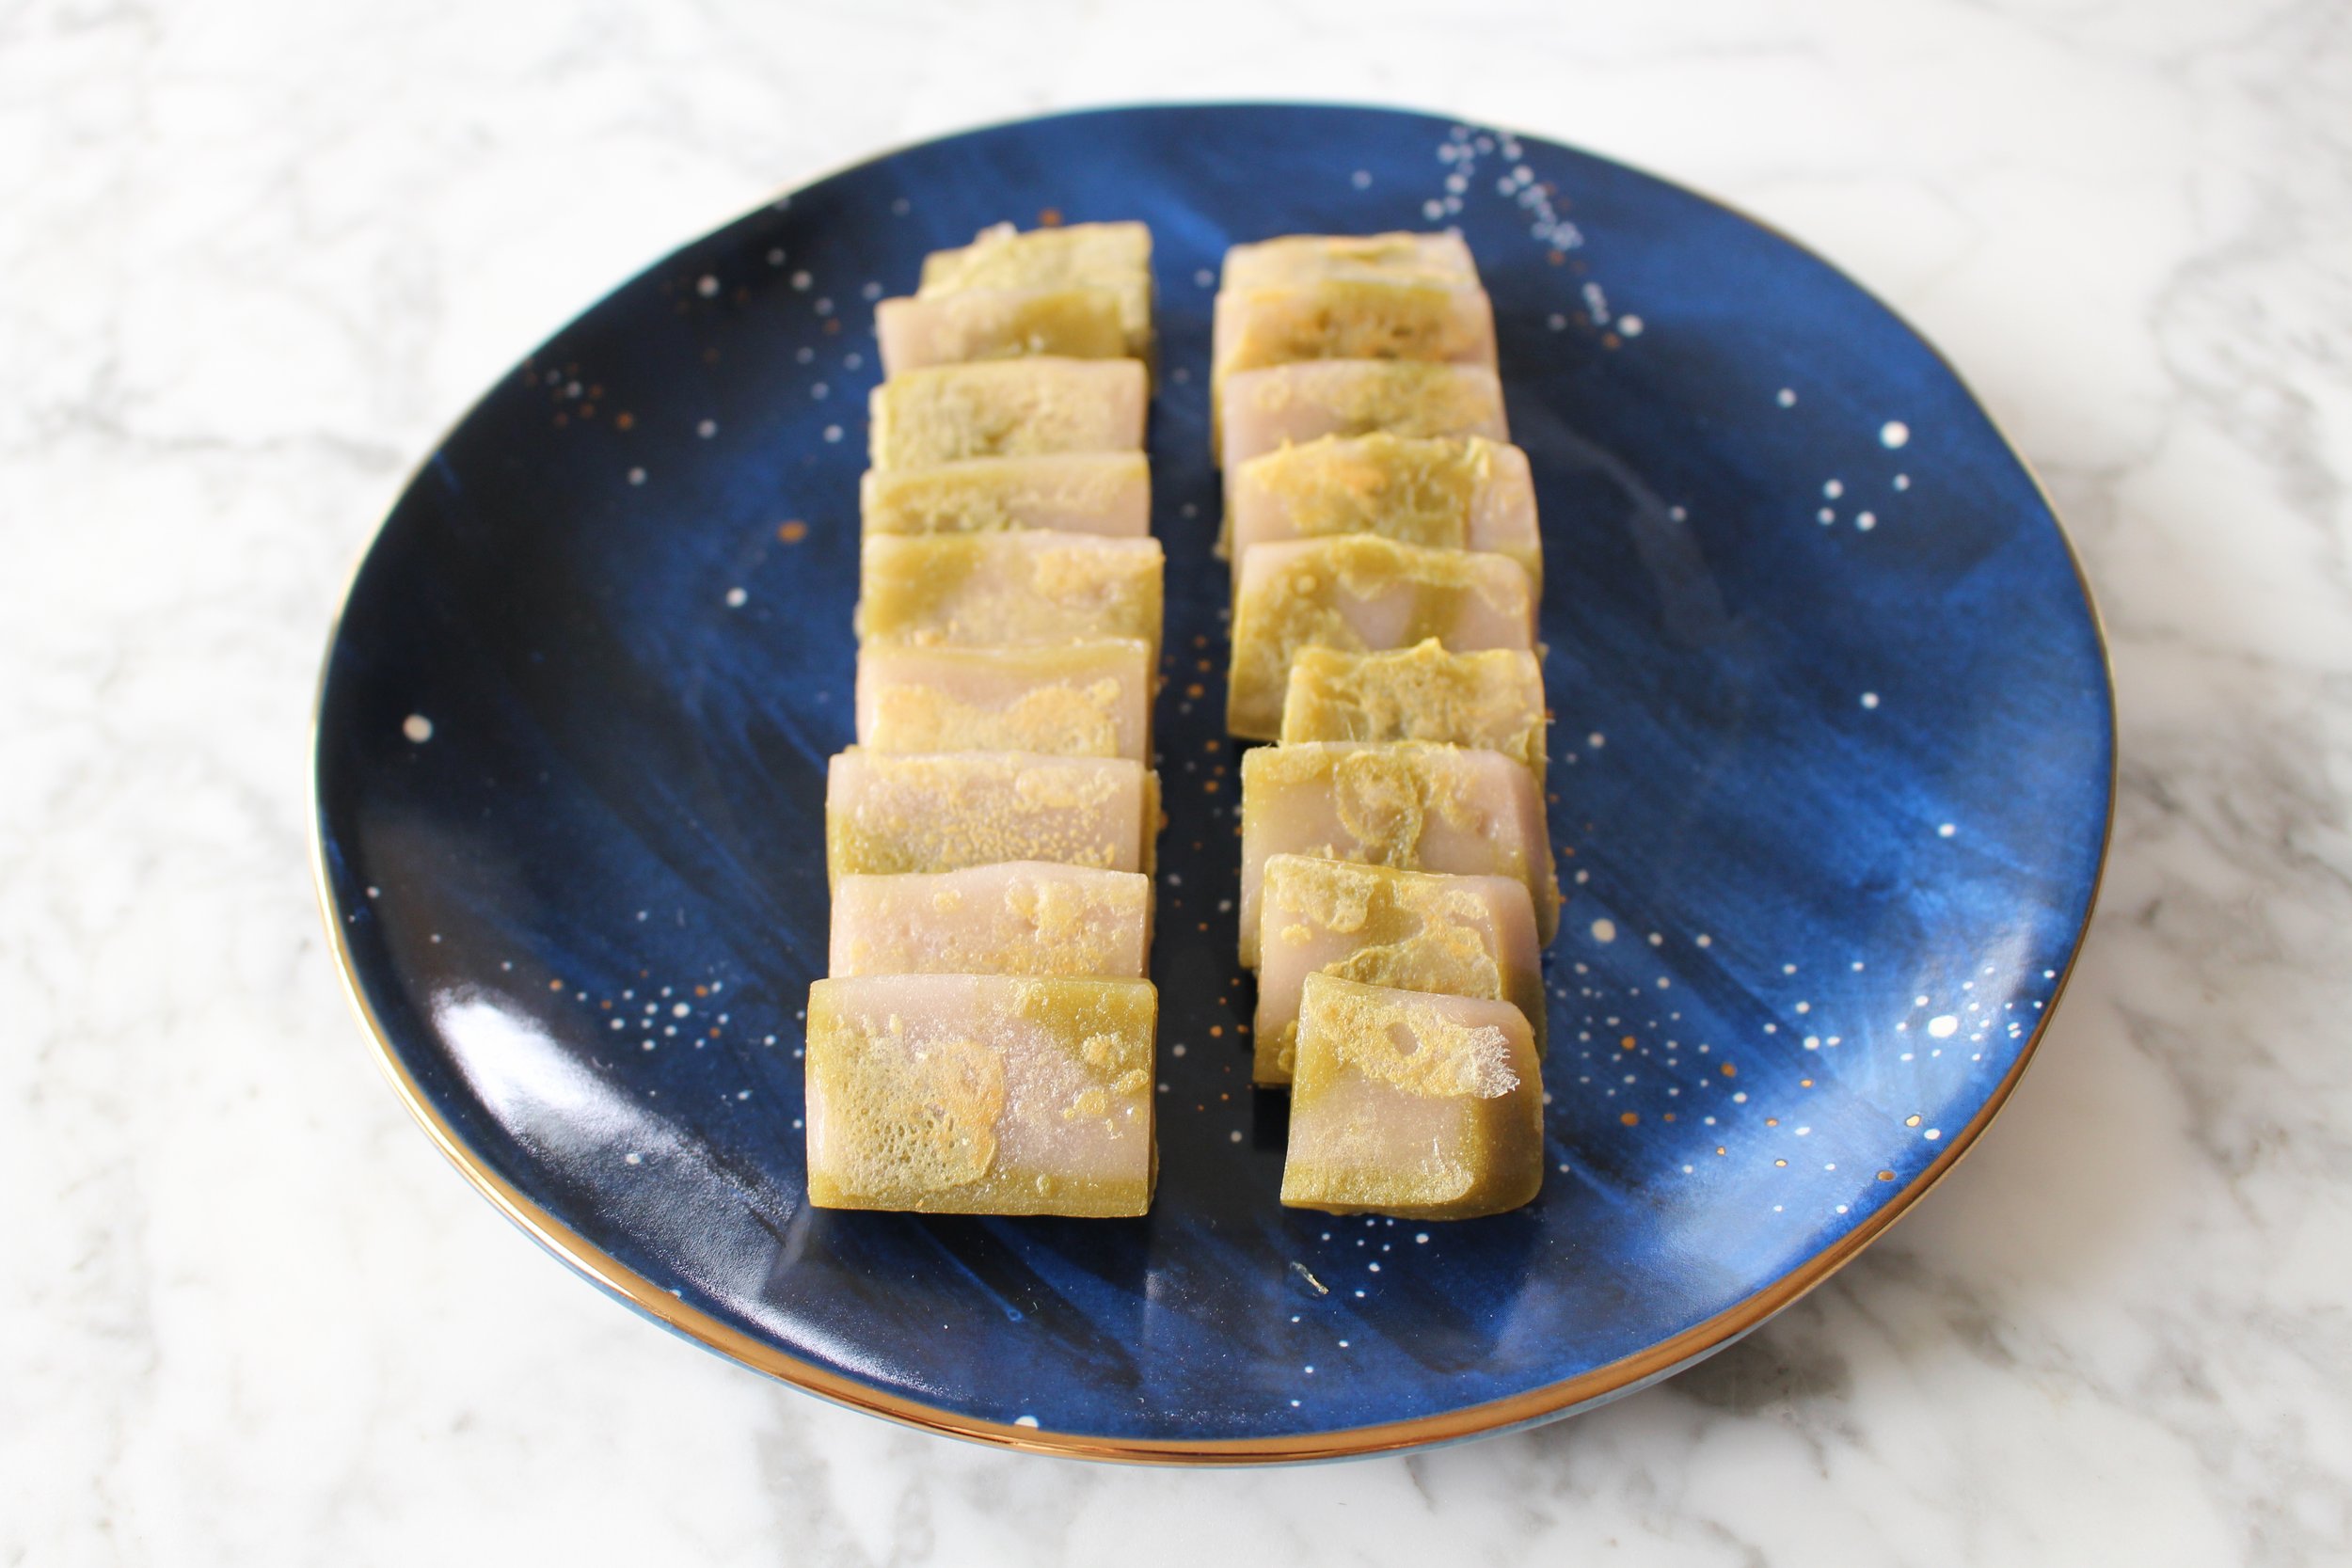
After waiting the night, slice the cake into your desired size pieces. Now you can either microwave it for a few seconds so that it’s soft and chewy, or you can pan fry it with an egg, a crowd favorite and personally my favorite way to eat it!
To pan fry the cake, beat an egg. When the pan is heated to a low-medium heat, dip the cake slices in the beaten egg then fry it on the pan for roughly 2 minutes per side. Then it’s ready to enjoy!
The Results
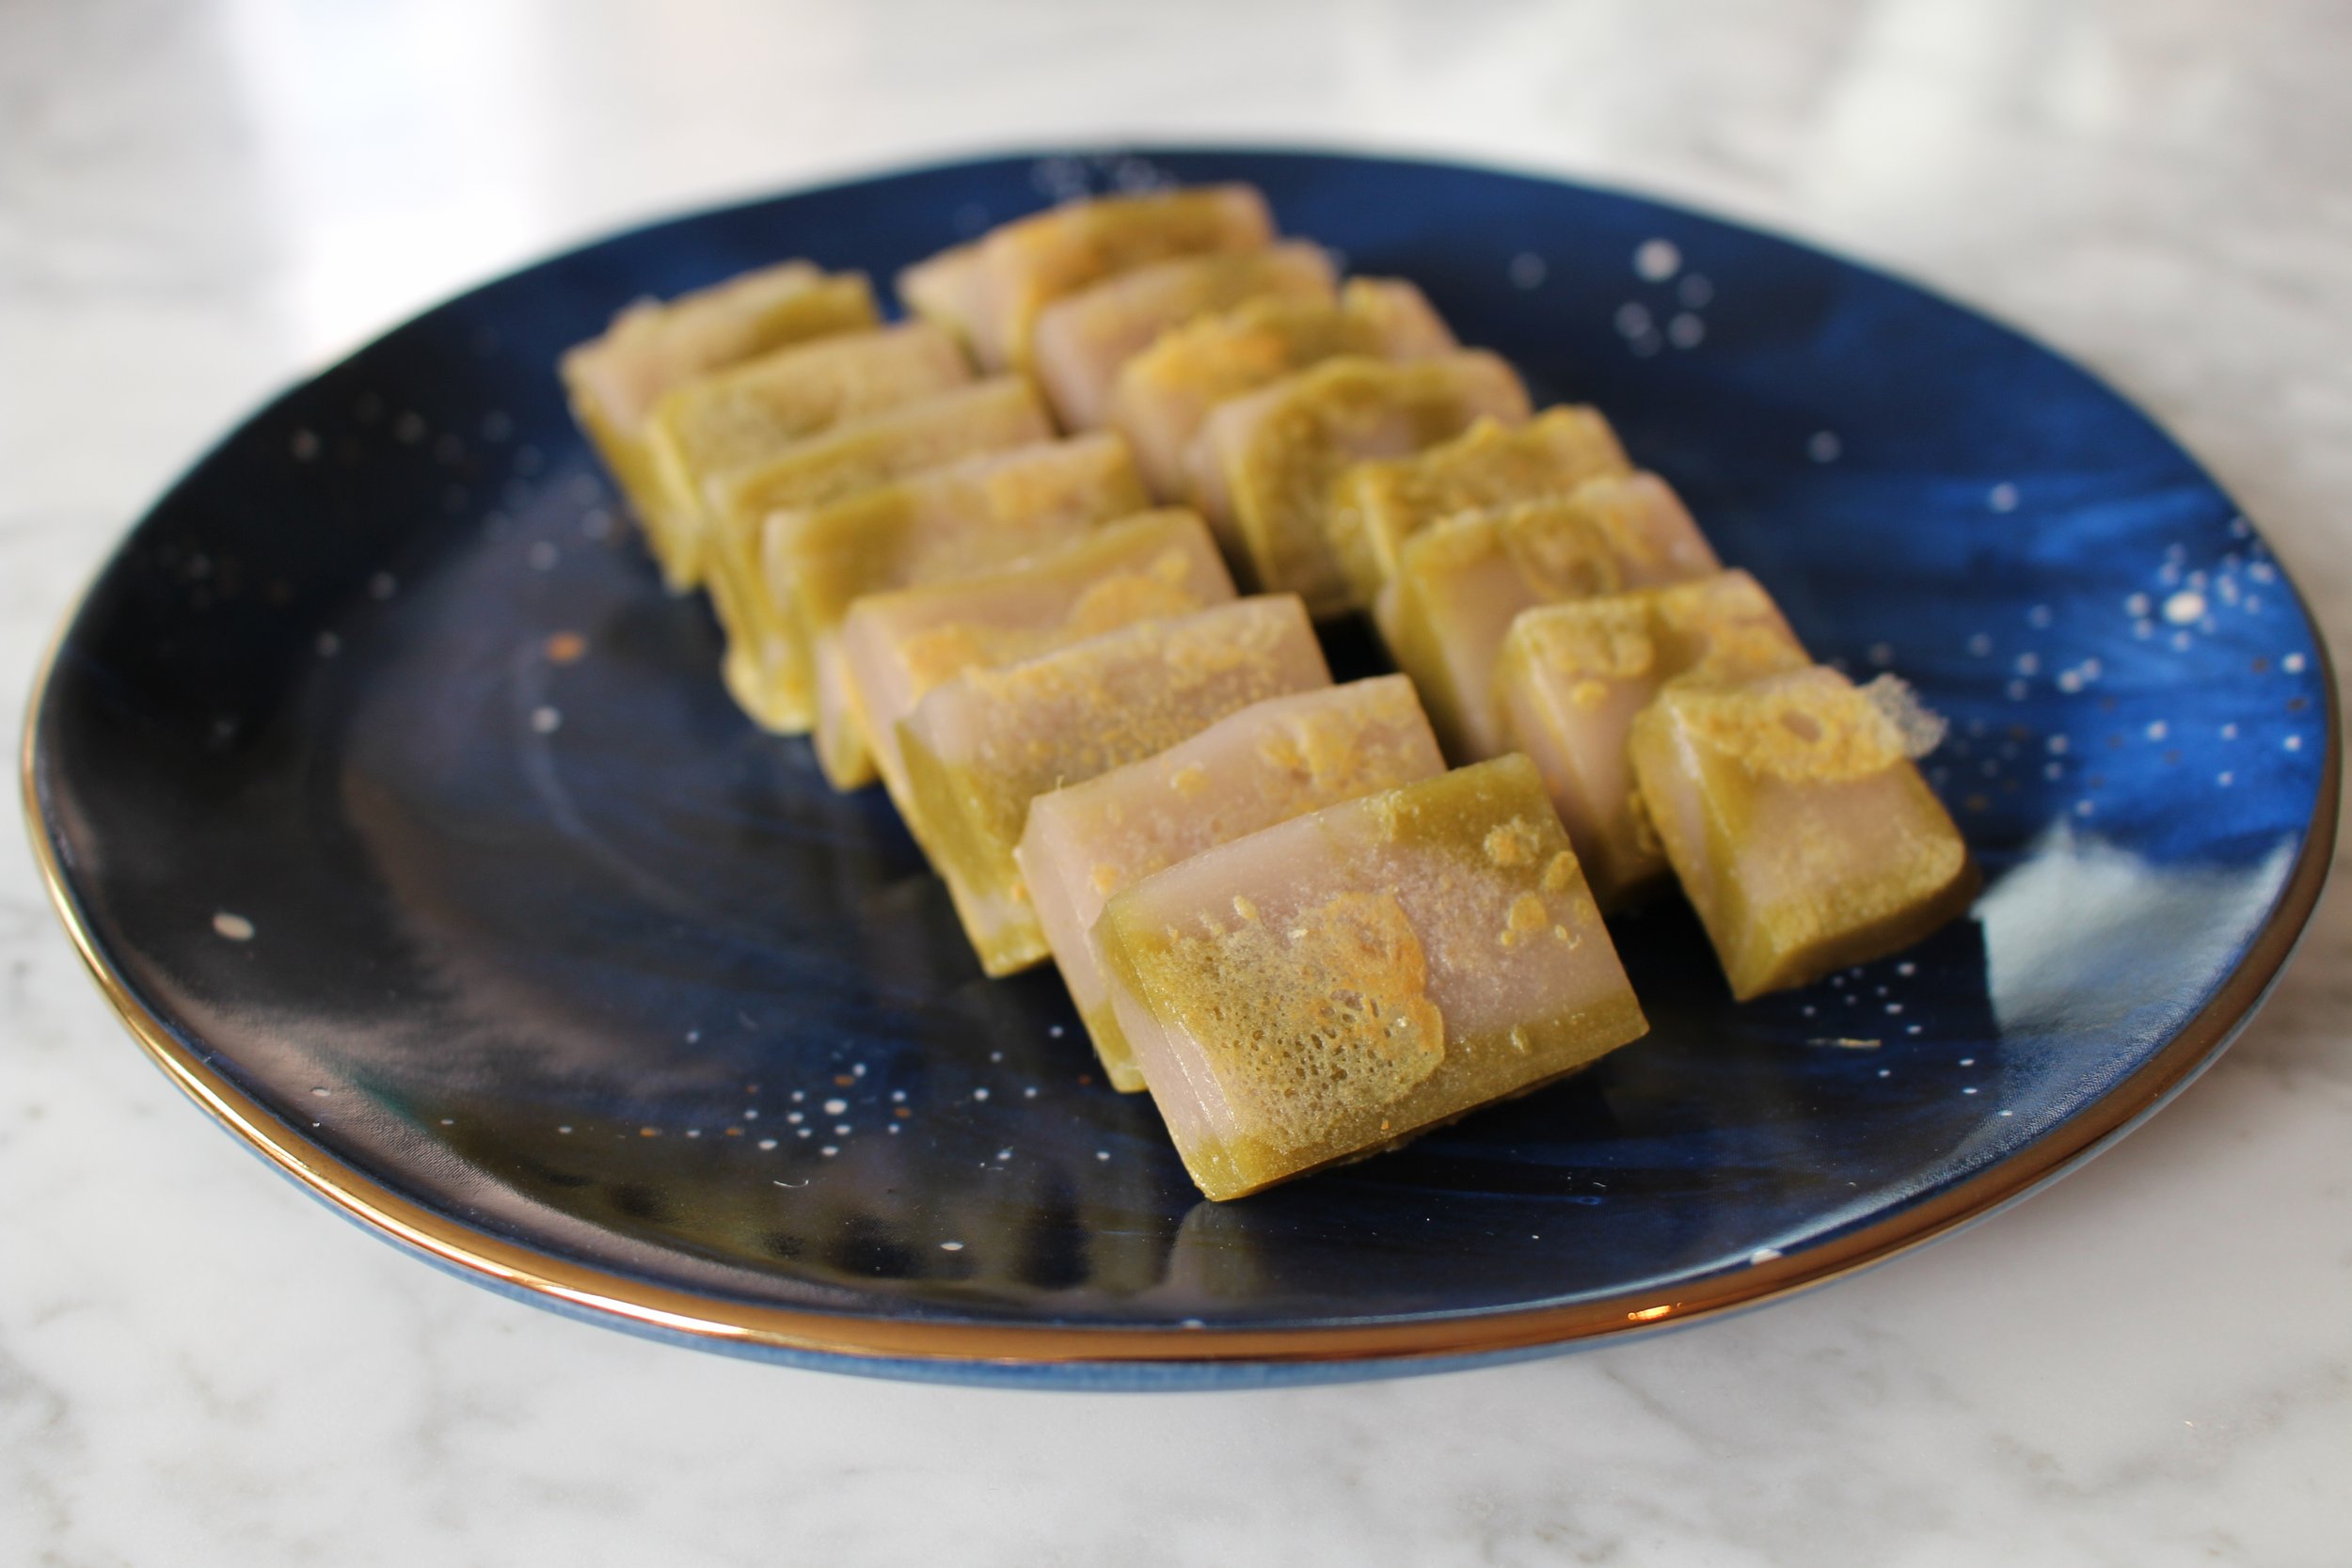
I absolutely loved how this recipe turned out! Sticky rice cakes have always been an essential part of my family’s Lunar New Year tradition, so it was so fun to give this classic dessert that I’ve always enjoyed a new and refreshing twist!
The cake is lightly sweet with a nice mild matcha flavor that comes through, though the taro flavor from the taro powder is less pronounced. If you prefer your desserts less sweet, you could reduce the granulated sugar, or vice versa if you like even more sweetness.
And pan frying the cake with egg adds an extra layer of flavor and texture that makes this nian gao even more perfect!
This is such a great and easy recipe that’s honestly good for any season, but is just extra special to ring in the Lunar New Year!
Taro Matcha Nian Gao
Ingredients
ºoº 1 1/2 cup glutinous rice flour
ºoº 1/2 cup rice flour
ºoº 1 cup water
ºoº 1/2 cup granulated sugar
ºoº 1/2 tbsp matcha powder
ºoº 1/2 tbsp taro powder
For pan frying (optional)
ºoº 1 egg
Directions
Mix together the rice flours. Divide in half and mix the matcha powder in one half and taro powder in the other
Microwave the water for roughly 45-60 seconds
Mix in the granulated sugar until it’s fully dissolved
Divide the sugar mixture in half and slowly mix half into the matcha powder dry mixture and the taro powder dry mixture while stirring continuously, leaving a few tablespoons of sugar mixture aside
Mix until the batter is roughly the consistency of condensed milk. If either batter is a bit too thick, add in a bit of the leftover sugar mixture until the right consistency is reached
Take turns pouring the two mixtures into a greased cake pan then give it a final mix to create a marbled look
Steam the cake for 1 hour 30 minutes or until a toothpick comes out of the center clean
Allow the cake to cool to room temperature, then cool in the refrigerator overnight
Remove from the refrigerator and slice while it’s still cool for easier cutting
If not pan frying, heat and enjoy!
(Optional if pan frying)
Beat an egg in a bowl
Heat a pan on low-medium heat
Dip each cake slice into the beaten egg and pan fry each side for roughly 2 minutes. Repeat for each slice
Notes
ºoº You can adjust the amount of granulated sugar depending on your preference
ºoº If making the cake in a single flavor, use a full tablespoon
ºoº You may need to adjust your steaming time depending on the steamer you’re using